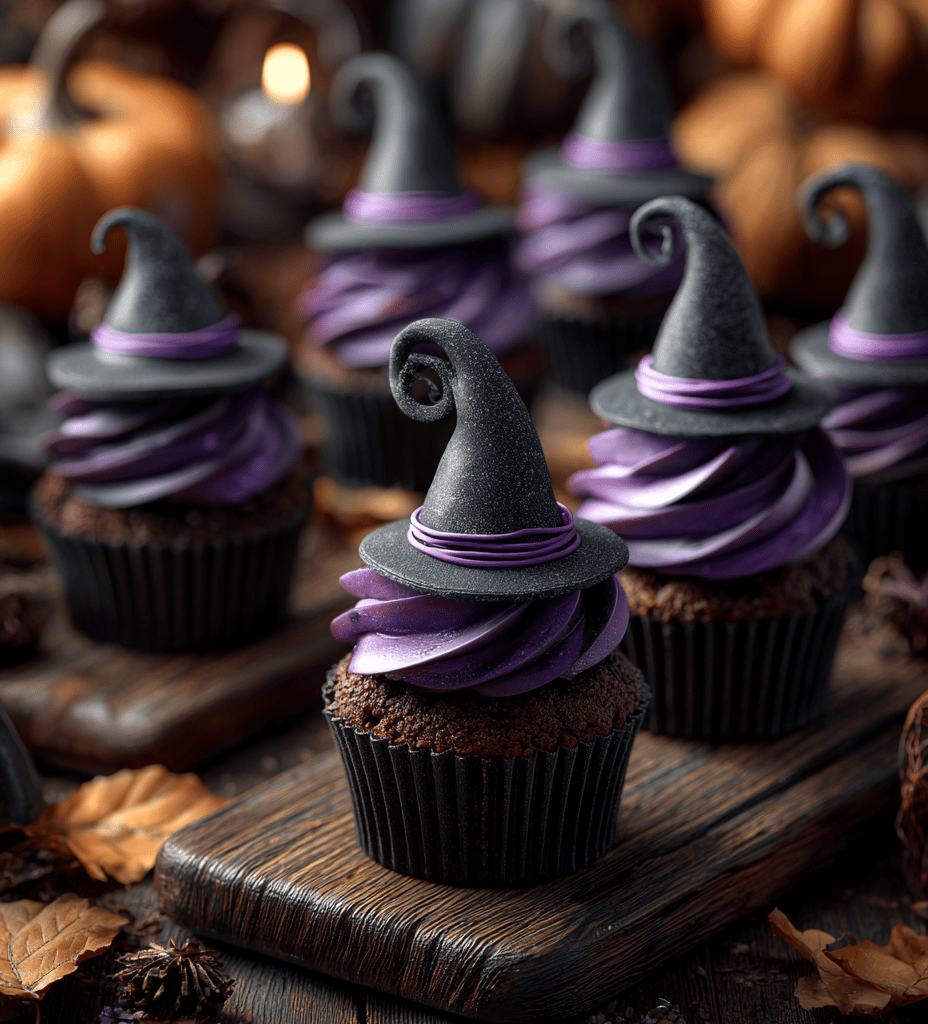

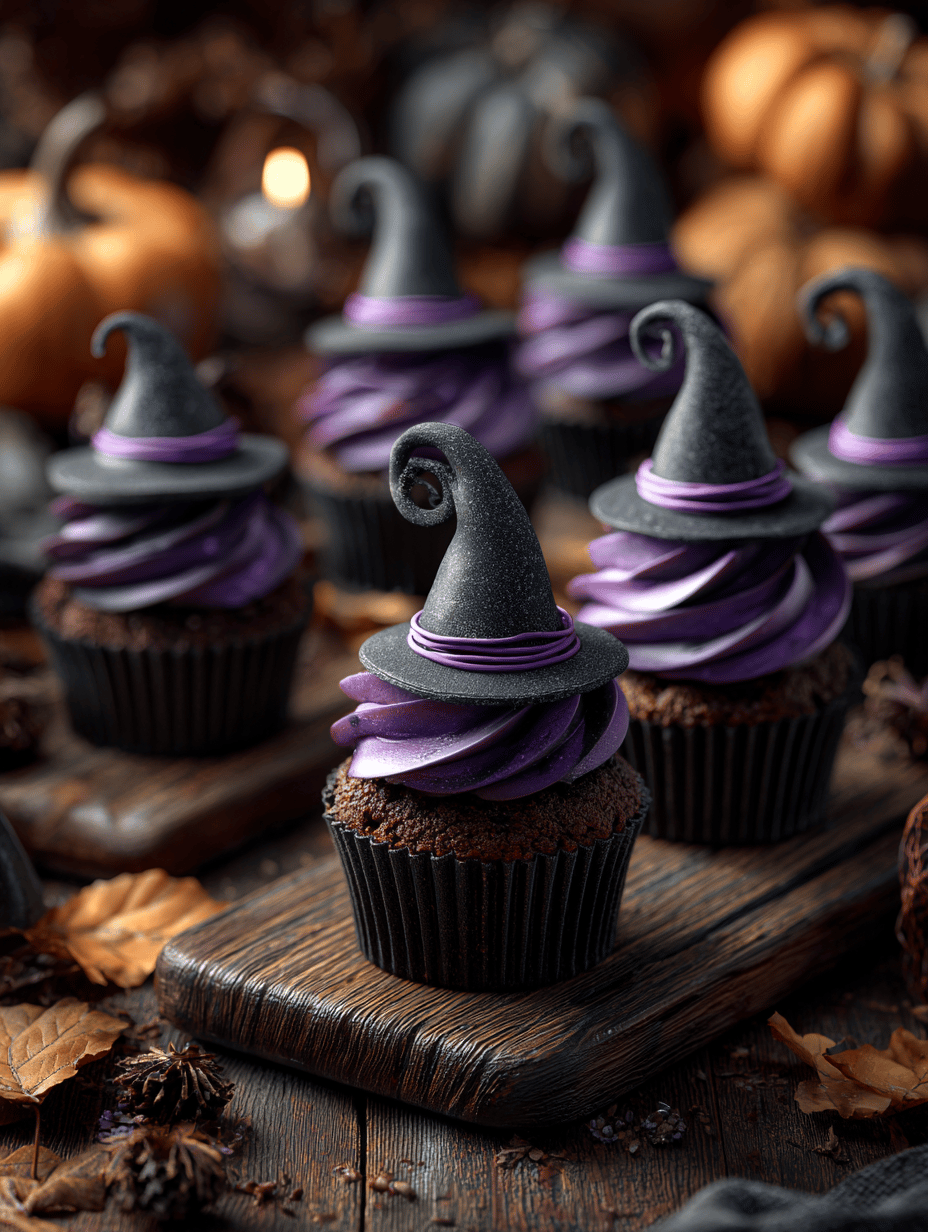
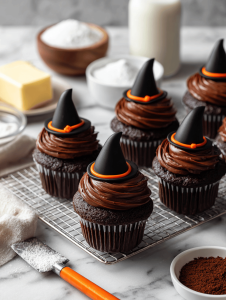
Baking these witch hat cupcakes is a small act of magic, turning familiar ingredients into something playful and a bit spooky. I love how a simple cone of frosting can transform a cupcake into a tiny witch’s hat, perfect for Halloween or any darkly fun gathering. Plus, they’re easy enough to make with kids or to surprise friends with a little edible mischief.
Why I Keep Making These
They’re quick to assemble, and the playful shapes spark joy in kids and adults alike. I love how a simple cupcake can be transformed into a tiny, mischievous witch’s hat—perfect for celebrations or just because. Plus, they make the whole kitchen smell like rich cocoa and vanilla, which is always a win.
Ingredients Breakdown & Tips
- Butter: Rich and creamy, gives the frosting a silky texture. Use unsalted for control.
- Cocoa powder: Provides deep chocolate flavor, enhances the spooky vibe. Substitute with dark chocolate if preferred.
- Powdered sugar: Sweetens and stiffens the frosting. For less sweetness, cut back slightly.
- Milk: Adjusts frosting consistency, adds a subtle creaminess. Use almond milk for dairy-free.
- Cake flour: Lightens the cupcake texture, avoid overmixing to keep them fluffy.
Tools of the Trade for Witch Hat Magic
- Cupcake tin: Holds the batter and shapes the cupcakes.
- Mixing bowls: Combine ingredients smoothly.
- Electric mixer: Cream butter and sugar efficiently.
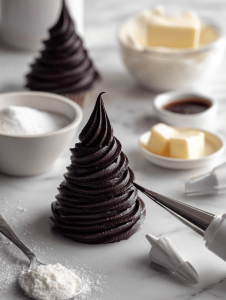
- Piping bag with cone tip: Shape the frosting into pointed hats.
- Cooling rack: Cool cupcakes evenly without sogginess.
Crafting the Perfect Witch Hat Cupcakes: Step by Step
Step 1: Preheat your oven to 180°C (350°F). Line a cupcake tin with paper liners.
Step 2: Mix the dry ingredients: flour, cocoa powder, baking powder, and salt. Set aside.
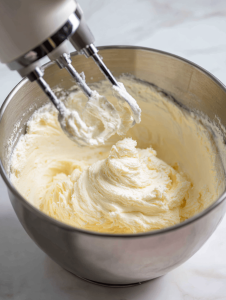
Step 3: Cream butter and sugar until light and fluffy, about 3 minutes. Add eggs one at a time.
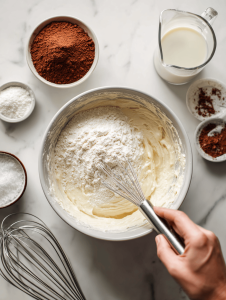
Step 4: Alternate adding dry ingredients and milk to the creamed mixture. Mix until just combined.
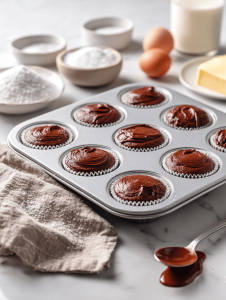
Step 5: Fill cupcake liners about 2/3 full. Bake for 18-20 minutes until a toothpick comes out clean.
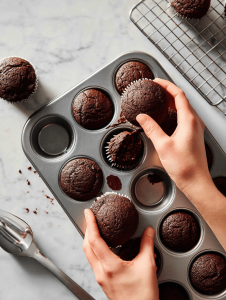
Step 6: Let cupcakes cool completely on a wire rack before decorating.
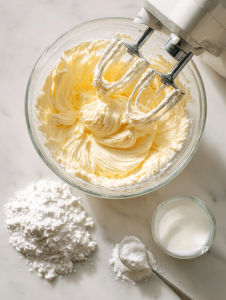
Step 7: Prepare frosting: beat butter, powdered sugar, vanilla, and a splash of milk until smooth.
Step 8: Frost cupcakes generously. Use a cone-shaped cookie or piping tip for the hat shape.
Cooking Checkpoints & Tips for Perfect Hats
- Cupcakes should be golden and springy when pressed lightly.
- Frosting should hold stiff peaks—test by lifting your spatula.
- The hats should stand upright without leaning or collapsing.
Common Pitfalls & How to Fix Them
- Cupcakes are sinking in the middle.? Add more flour if cupcakes are too flat.
- Frosting slides off the cupcakes.? Chill frosting if too soft.
- Hats look underdone or soggy.? Bake a minute longer if the tops are shiny.
- Frosting appears messy or uneven.? Use a sharper piping tip for cleaner hats.
Witch Hat Cupcakes
Ingredients
Equipment
Method
- Preheat your oven to 180°C (350°F). Line a cupcake tin with paper liners, ready for baking.
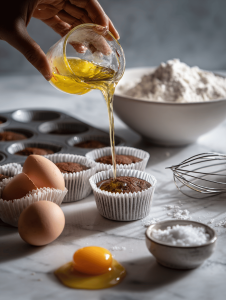
- Mix the dry ingredients: sift together the flour, cocoa powder, baking powder, and salt in a bowl. Set aside.

- In a large mixing bowl, cream the softened butter and sugar using an electric mixer until the mixture is light, fluffy, and fragrant, about 3 minutes.
- Add eggs one at a time to the creamed mixture, beating well after each addition, until the batter is smooth and slightly thickened.

- Alternate adding the dry mixture and milk to the wet ingredients, starting and ending with the dry, mixing gently after each addition until just combined.
- Divide the batter evenly among the cupcake liners, filling each about two-thirds full. Bake for 18-20 minutes, or until a toothpick inserted in the center comes out clean.
- Remove the cupcakes from the oven and let them cool in the tin for 5 minutes, then transfer to a wire rack to cool completely. The cupcakes should be moist and springy to the touch.
- While the cupcakes cool, prepare the frosting: beat softened butter until creamy, then gradually add the powdered sugar, vanilla, and milk, beating until smooth and stiff enough to hold peaks.
- Fill a piping bag fitted with a cone tip with the frosting. Pipe a generous amount onto each cupcake, shaping it into a tall cone to resemble a witch’s hat.
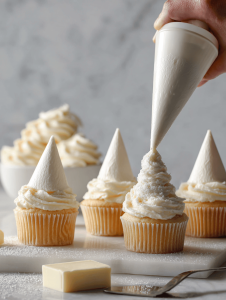
- Adjust the shape of the frosting to ensure the hats stand upright and have a pointed tip, creating a fun, spooky look.
- Serve these adorable witch hats immediately or store them in an airtight container. Enjoy the soft, moist cupcake with the rich, decorative frosting for a festive treat!

Hi there! I’m Isabella, the founder and curious foodie behind Crumb Detective. I’ve always believed that every dish has a story to tell — from the secret family recipes passed down through generations to the bold experiments happening in kitchens around the world.