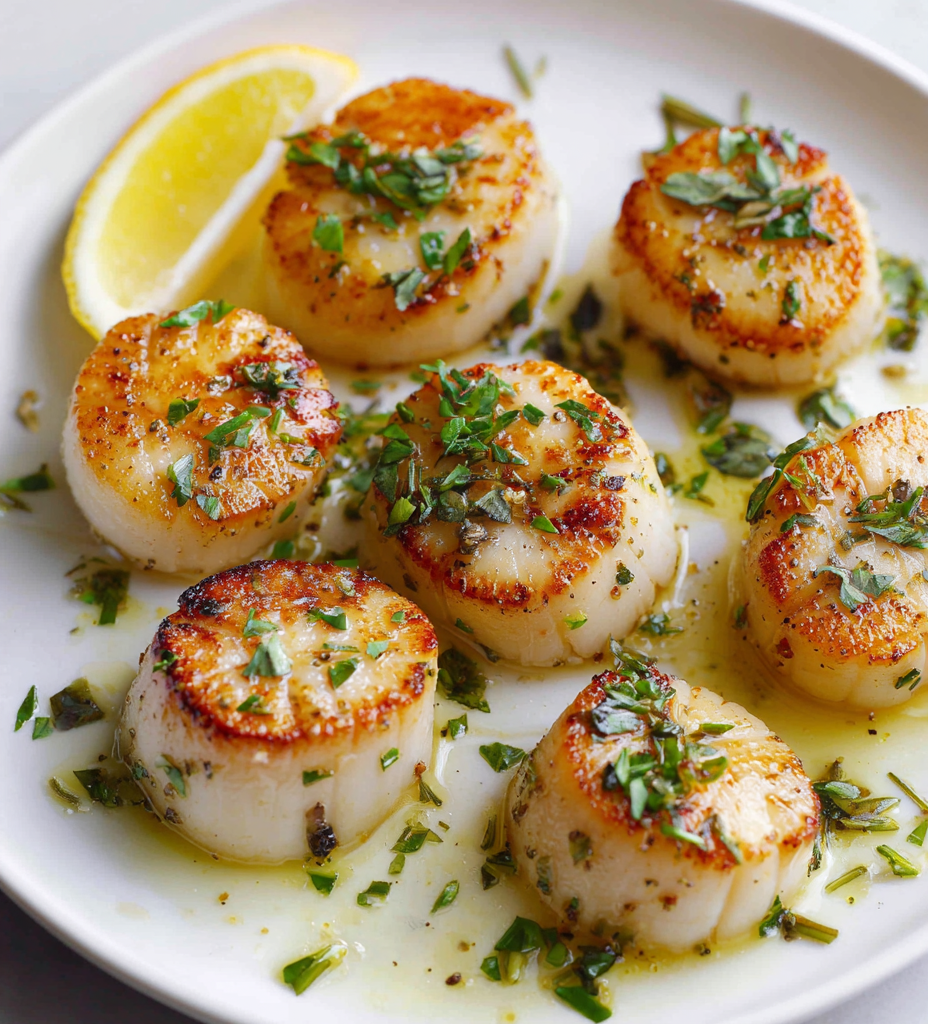
Getting a perfect sear on scallops isn’t just about the technique; it’s about understanding your pan’s temperature. Too cold, and they’ll end up steamed rather than caramelized; too hot, and they burn before they cook through. It’s a small dance, but once you get the heat right, those scallops turn into something special—crisp on the outside, tender inside, with a fragrant, buttery aroma that fills the kitchen.
I’ve ruined more scallops than I care to admit by rushing the heat or not paying attention to the surface. But once I learned to trust that initial sizzle, it became a quick, almost meditative process. It’s surprising how much joy a handful of these tiny treasures can bring when cooked with just a simple technique and a keen eye for the pan’s temperature.
Focusing on the overlooked importance of the pan’s temperature and its role in achieving the perfect sear, this recipe explores how a hot pan transforms scallops from rubbery to tender with a caramelized crust that’s just right.
The art of the perfect sear
- The first time I got a perfect sear, I felt like I’d cracked some secret code in the kitchen.
- Watching scallops turn from dull gray to golden-brown with just the right sizzle always feels like magic—simple yet profound.
- I used to think searing was intimidating, but now I see it’s really about trusting the pan and staying attentive.
- There’s a quiet thrill in flipping those scallops and seeing that caramelized crust form—like a tiny victory every time.
The art of the perfect sear
Searing scallops has always felt like a delicate balance — too much heat, and they scorch before cooking through; too little, and they don’t develop that beautiful crust. I remember the first time I nailed it, how the kitchen filled with a warm, buttery aroma, the scallops turning a perfect golden-brown. That moment made me realize how simple techniques and patience can turn a humble ingredient into something memorable. It’s become a little ritual, a way to slow down and truly appreciate the beauty of good ingredients and a well-heated pan.
Fun facts about scallop searing
- Pan-searing as a technique dates back to ancient cooking methods that relied on direct heat for quick, flavorful results.
- Scallops have been a prized delicacy in coastal cultures for centuries, especially in French and Japanese cuisines.
- The Maillard reaction, responsible for that irresistible caramelized crust, was first scientifically described in the early 20th century.
- In seafood-centric regions, searing scallops became popular as a way to enhance their natural sweetness and tender texture.
- Historically, the ability to perfectly sear scallops signified a cook’s skill, often reserved for special occasions or high-end restaurants.
Key ingredients for perfect searing
- Scallops: I look for those with a dry, firm surface—sogginess means they might be waterlogged, which dulls the sear; skip those. Second-person: Choose dry-packed scallops for a better crust and less steam.
- Salt: I season just before searing—too early and moisture will draw out, making it harder to get that caramelized crust; salt right before helps. Second-person: Use kosher salt for even seasoning and better crust development.
- Oil: I prefer a neutral oil with a high smoke point, like grapeseed or canola—olive oil can burn too quickly. Second-person: Keep the oil shimmering but not smoking to prevent bitterness.
- Butter: I add butter at the end for richness and flavor—watch it carefully so it doesn’t burn. Second-person: Use unsalted butter for control and add a squeeze of lemon for brightness.
- Pan: I use a heavy-bottomed skillet—cast iron or stainless steel—so heat distributes evenly. Second-person: Preheat the pan on medium-high until just shy of smoking before adding scallops.
- Lemon: I serve with fresh lemon wedges—brightens the richness of the scallops. Second-person: Squeeze just before eating to preserve that zesty, fresh aroma.
- Herbs: I sometimes toss in a sprig of thyme or parsley, but only if I want a subtle herbal note. Second-person: Keep herbs optional and add after searing for a cleaner look and taste.
Spotlight on key ingredients
Scallops:
- I look for those with a dry, firm surface—sogginess means they might be waterlogged, which dulls the sear; skip those. Second-person: Choose dry-packed scallops for a better crust and less steam.
- Salt: I season just before searing—too early and moisture will draw out, making it harder to get that caramelized crust; salt right before helps. Second-person: Use kosher salt for even seasoning and better crust development.
Cooking fat (oil & butter):
- Oil: I prefer a neutral oil with a high smoke point, like grapeseed or canola—olive oil can burn too quickly. Second-person: Keep the oil shimmering but not smoking to prevent bitterness.
- Butter: I add butter at the end for richness and flavor—watch it carefully so it doesn’t burn. Second-person: Use unsalted butter for control and add a squeeze of lemon for brightness.
Notes for ingredient swaps
- Seafood Alternatives: Salmon or shrimp can be seared similarly, but they need different cooking times and may not develop the same crust. Adjust accordingly.
- Oil Choices: Grape seed or canola oil work well for high heat and neutral flavor. Olive oil can smoke too quickly, risking bitterness.
- Butter: Use clarified butter or ghee if you want a cleaner, less foamy finish. Regular butter adds richness but can burn if not careful.
- Salt: Kosher salt offers better control and seasoning. Fine sea salt can be used but keep an eye on the amount to prevent over-salting.
- Lemon: Lemon juice can be replaced with lime or vinegar for a different acidic note. Freshness is key—add just before serving.
- Herbs: Fresh thyme or parsley add subtle herbal notes. Dried herbs are too concentrated and can overpower the delicate scallops.
- Pan Type: Cast iron gives a great sear but can be heavy; stainless steel heats evenly. Non-stick won’t develop a crust but is easier to handle.
Equipment & Tools
- Heavy skillet (cast iron or stainless steel): Ensure even heat distribution for a perfect sear.
- Tongs or fish spatula: Gently flip scallops without breaking them.
- Paper towels: Thoroughly dry scallops to prevent steaming.
- Spoon: Baste scallops with melted butter for added flavor.
Guide to searing scallops perfectly
- Equipment & Tools: Use a heavy-bottomed skillet—cast iron or stainless steel—for even heat. Tongs or a fish spatula for flipping. Paper towels for drying scallops. A small spoon for butter basting.
- Pat scallops dry with paper towels. Remove any side muscle if attached. Lightly season with salt just before cooking.
- Preheat your skillet over medium-high heat until just shy of smoking—about 2-3 minutes. Add a tablespoon of neutral oil; swirl to coat. The oil should shimmer but not smoke.
- Carefully place scallops in the hot pan, spaced evenly. Don’t overcrowd; work in batches if needed. Sear without moving for 2-3 minutes. Look for a golden-brown crust forming.
- Flip scallops gently with tongs or a spatula. Sear the other side for another 1.5-2 minutes. The edges should be opaque, and the crust deep golden.
- Optional: Add a small knob of butter and a squeeze of lemon to the pan. Tilt the pan and baste the scallops with the melted butter for extra richness. Cook for another 30 seconds.
- Check for doneness: scallops should be firm but tender, with a slightly translucent center. The crust should be crisp and caramelized.
- Rest & Plate: Transfer scallops to a plate and let rest for 1 minute. Serve immediately with your choice of garnish or sauce.
- Checkpoints: 1. Crust is deep golden brown. 2. Edges are opaque and firm. 3. The scallops feel slightly springy but not rubbery when pressed.
Transfer scallops to a warm plate and let rest for 1 minute to allow juices to redistribute. Serve immediately to enjoy the crisp crust and tender interior at their best.
How to Know It’s Done
- Crust is deep golden brown and caramelized.
- Edges are opaque and firm, with a slight give when pressed.
- Internal temperature reaches about 50°C (122°F), tender but not raw.
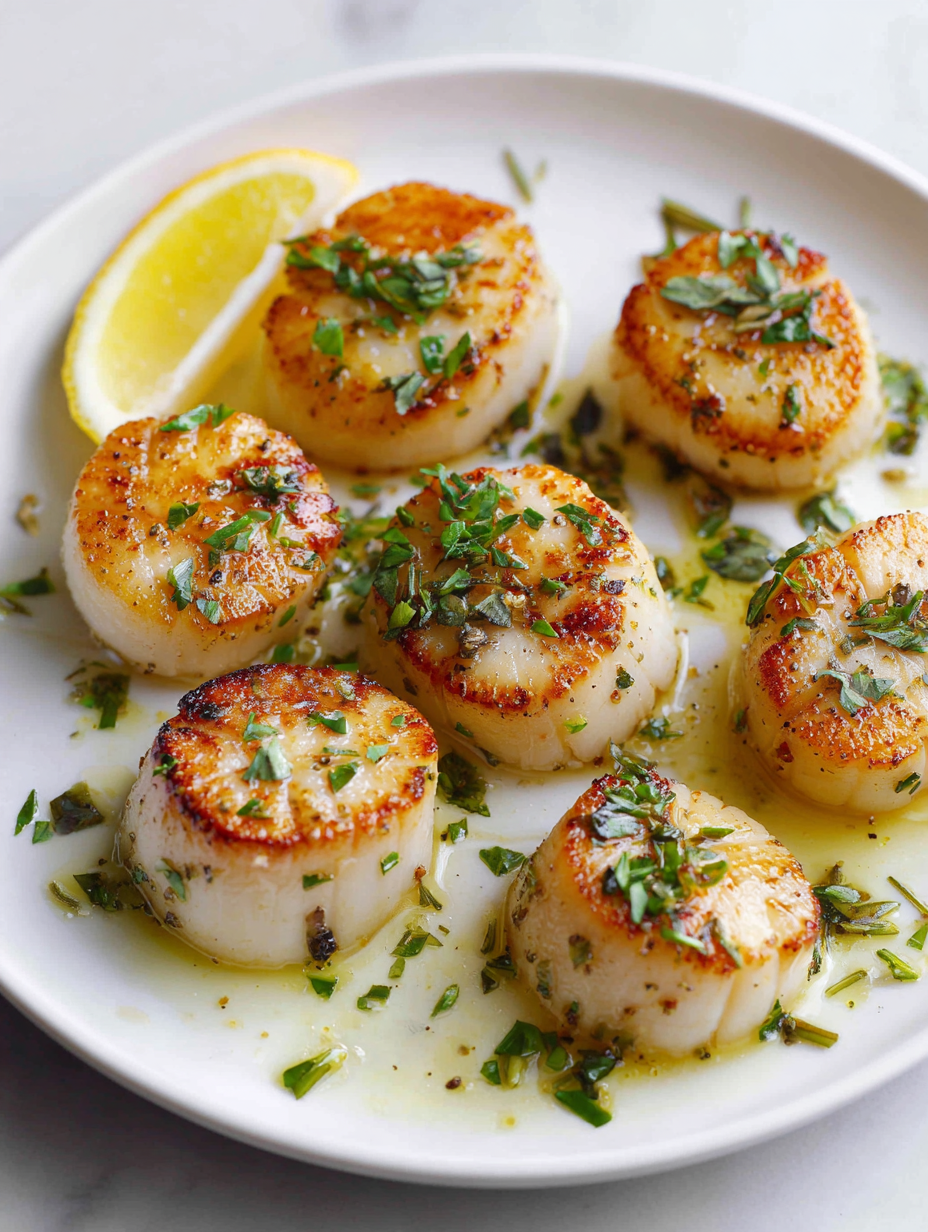
Perfect Pan-Seared Scallops
Ingredients
Equipment
Method
- Pat the scallops dry thoroughly with paper towels, removing any moisture and the side muscle if attached. Lightly season with kosher salt just before cooking to help the crust develop.
- Preheat your heavy skillet over medium-high heat until it’s just shy of smoking—this takes about 2-3 minutes. Add the neutral oil and swirl to coat the bottom of the pan. The oil should shimmer and emit a faint sizzling sound.
- Carefully place the scallops in the hot pan, spaced evenly apart to avoid overcrowding. Let them sit undisturbed for 2-3 minutes, watching as the edges start to turn a deep golden-brown and a crispy crust forms.
- Flip each scallop gently using tongs or a fish spatula. Sear the other side for another 1.5-2 minutes until the surface is golden and the edges are opaque. You should hear a gentle sizzle and see a rich, caramelized crust.
- Add the unsalted butter to the pan, then tilt it slightly to pool the melted butter. Use a spoon to baste the scallops with the fragrant, bubbling butter for about 30 seconds, enhancing their richness.
- Squeeze fresh lemon juice over the scallops for brightness, then remove them from the pan and transfer to a serving plate. Let the scallops rest for 1 minute to allow the juices to settle and finish cooking gently inside.
- Serve immediately, garnished with extra lemon wedges or herbs if desired, and enjoy their crispy exterior paired with tender, buttery insides.
Pro tips for perfect scallops
- Preheat thoroughly: Ensure your pan is hot enough—almost smoking—before adding scallops for that perfect crust.
- Dry well: Pat scallops completely dry with paper towels; moisture is the enemy of searing and causes steaming.
- Don’t overcrowd: Sear in batches if needed; overcrowding drops the temperature, resulting in uneven browning.
- Sear without moving: Place scallops and let them sit untouched for 2-3 minutes until a deep golden crust forms.
- Use butter last: Add butter in the final moments for richness, and baste quickly to prevent burning.
- Check for doneness: Look for opaque edges and a firm yet tender feel—overcooking turns them rubbery fast.
- Rest briefly: Let scallops sit for a minute after searing; this helps juices settle and keeps them tender.
Common mistakes and how to fix them
- FORGOT to dry scallops thoroughly → they won’t sear properly; pat dry with paper towels.
- DUMPED oil into a cold pan → always preheat the pan first for a proper sear.
- OVER-TORCHED the scallops → reduce heat immediately and add butter to mellow the flavor.
- MISSED the resting step → let scallops rest 1 minute after searing for juicier bites.
Fast fixes for searing success
- When scallops stick, splash a tiny bit of water to loosen for easy flipping.
- If the pan smokes too much, reduce heat immediately and add a splash of cold oil.
- Dumped oil everywhere? Wipe the pan quickly and start with fresh oil for even searing.
- Overcooked scallops? Rest them for 1 minute and serve with a squeeze of lemon to brighten flavor.
- Shield scallops from cold air with a towel if they cool down before searing for better crust formation.
Prep, store, and reheat tips
- Pat scallops dry with paper towels before storing; moisture can cause spoilage and affect searing quality.
- Store dry-packed scallops in an airtight container in the fridge for up to 2 days; keep them cold and dry.
- If freezing, wrap tightly in plastic wrap and then in foil; they last up to 3 months, but may lose some texture.
- Reheat scallops gently in a warm skillet with a touch of butter or oil—avoid microwaving to prevent rubberiness.
- Scent should remain fresh and ocean-like; any sour or ammonia smell means they’re no longer good. Texture should stay firm and not slimy.
Top questions about pan seared scallops
1. How do I choose good scallops for searing?
Look for scallops that are dry on the surface and feel firm to the touch. Soggy or waterlogged scallops won’t sear well. Skip those for better caramelization.
2. Should I dry the scallops before cooking?
Pat them thoroughly dry with paper towels to remove any moisture. Moisture causes steaming, not searing, and results in a dull crust.
3. How hot should the pan be for searing?
Use a heavy-bottomed skillet preheated until just shy of smoking—around 200°C (392°F). Add oil and wait until it shimmers before adding scallops.
4. How long do I sear scallops on each side?
Place scallops gently in the pan without overcrowding. Let them sear undisturbed for 2-3 minutes until a deep golden crust forms before flipping.
5. When do I add butter and lemon?
Flip carefully with tongs or a spatula. Sear the other side for 1.5-2 minutes until opaque and crusty. Add butter and lemon at the end for extra flavor.
6. How do I know when scallops are cooked properly?
Scallops are done when they’re opaque, firm but tender, and have a crisp, caramelized crust. The interior should be slightly translucent but not raw.
7. Should I let scallops rest after cooking?
Rest the scallops for about 1 minute after searing. This helps juices redistribute and keeps them juicy and tender when served.
8. How can I avoid overcooking scallops?
Overcooking leads to rubbery texture. Keep an eye on the color and firmness. Use a timer and remove them as soon as they turn opaque and golden.
9. What if scallops stick or burn?
If scallops stick to the pan, splash a little water to loosen them. If they burn, reduce the heat immediately and add fresh oil for a better sear.
10. How should I store and reheat scallops?
Store scallops in a dry, airtight container in the fridge for up to 2 days. Reheat gently in a warm skillet, avoiding microwave to prevent rubberiness.
Mastering the simple act of searing scallops can really change how you see ingredients. When that crust hits just right, it’s like a little celebration in your mouth, especially with a squeeze of lemon. It’s a quick dish, but one that demands your attention and respect for the heat.
There’s a quiet satisfaction in pulling off a perfect sear, and it’s one of those recipes that makes you trust your instincts more. Plus, it’s perfect for those nights when you want something impressive but straightforward—no fuss, just honest, good cooking.

Hi there! I’m Isabella, the founder and curious foodie behind Crumb Detective. I’ve always believed that every dish has a story to tell — from the secret family recipes passed down through generations to the bold experiments happening in kitchens around the world.