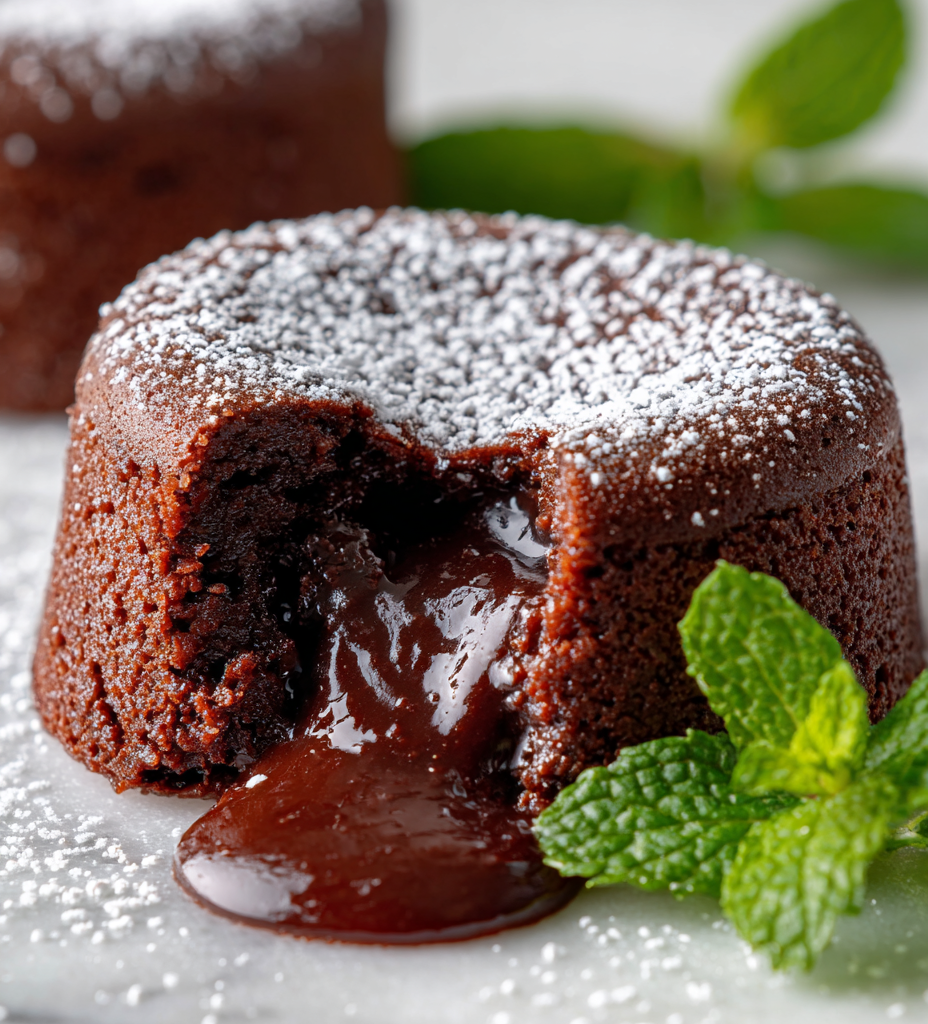

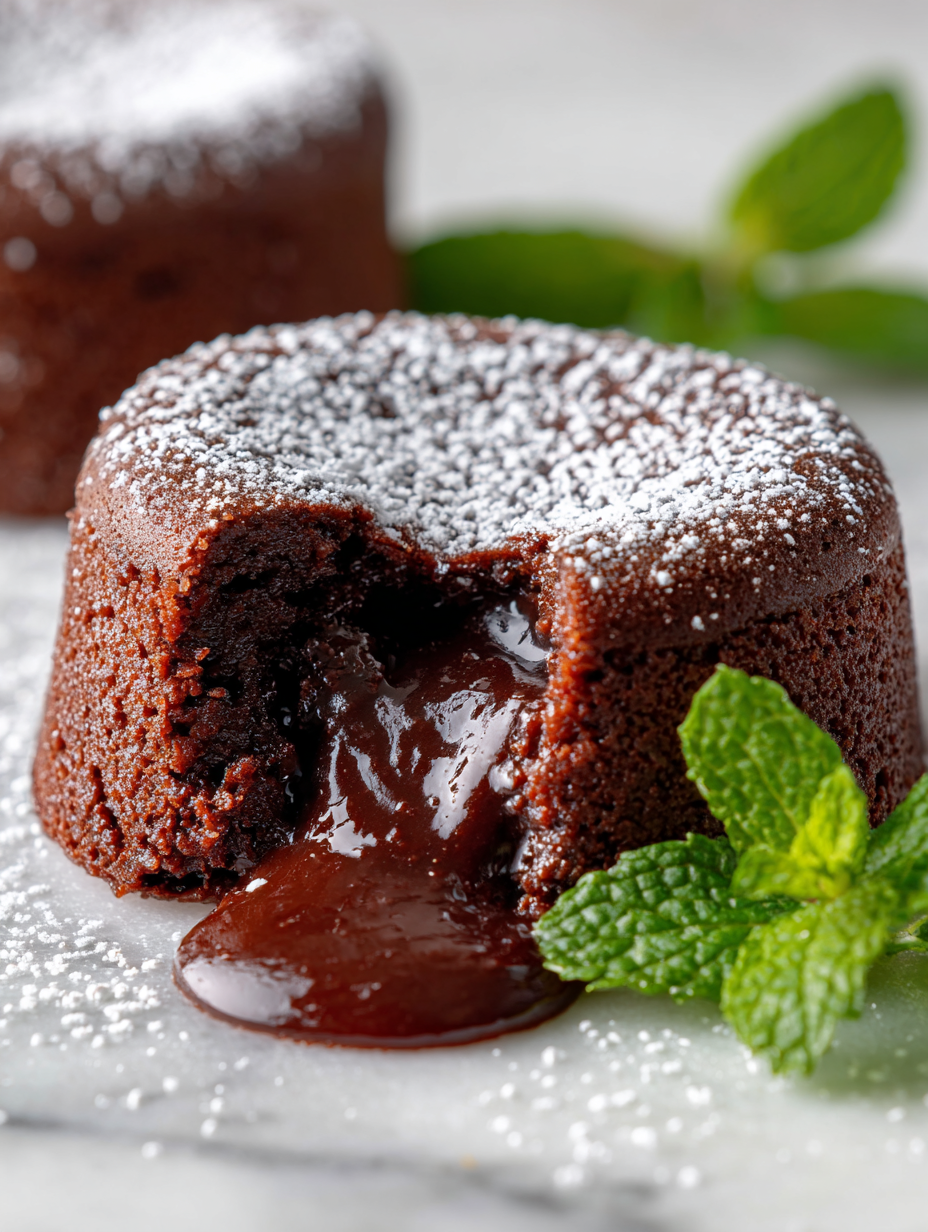
Focusing on the rare, almost meditative process of achieving the perfect molten core, this recipe emphasizes the tactile joy of gently jiggling the fondant and watching the rich chocolate oozing out, turning a simple dessert into an intimate ritual.
There’s something quiet and almost sacred about that moment when you crack the surface and the warm, velvety chocolate flows freely. It’s not just about taste but about the feel of the batter, the anticipation of that gooey center. Each step feels like a small act of devotion, a pause in a busy day.
Making chocolate fondant is less about perfection and more about tuning into the rhythm of your oven and your instincts. It’s surprisingly forgiving once you get the timing right, and the reward is a dessert that’s both deeply comforting and a little bit magical in its simplicity.
Focusing on the rare, almost meditative process of achieving the perfect molten core, this recipe emphasizes the tactile joy of gently jiggling the fondant and watching the rich chocolate oozing out, turning a simple dessert into an intimate ritual.
The tactile joy of molten chocolate
- The moment I see that crack forming on top, I feel a rush of excitement—like catching a secret in the kitchen.
- There’s a quiet pride in pulling out a perfectly gooey fondant, especially when it melts in my mouth like liquid velvet.
- Sometimes I get nervous about overbaking, but the chaos of timing makes the reward all the sweeter when it’s just right.
- Watching the chocolate oozing out as I cut into it reminds me of childhood afternoons spent baking with family, full of warmth.
- That fleeting moment when the crust is just firm enough but the center stays molten—that’s pure, unfiltered satisfaction.
The story behind this recipe
- This recipe comes from a quiet weekend in Provence, where I watched a pastry chef craft these little molten cakes with such patience. It struck me how a simple technique, with just the right touch, can transform a humble chocolate batter into something almost hypnotic. Ever since, I’ve been chasing that perfect balance of gooey and baked, a ritual that feels both nostalgic and intensely personal.
- There’s a kind of meditative rhythm in making fondant—the gentle folding, the careful timing, the anticipation of that moment when it all comes together. It’s not about fancy ingredients, but about tuning into your oven and trusting your instincts. Each batch reminds me that sometimes, the simplest pleasures require the most attentive hand.
- It’s a dessert that’s rooted in memory—those warm kitchen afternoons, the smell of melting chocolate, the joy of cracking the crust and revealing silky, molten richness inside. It’s a tiny act of patience that rewards you with pure, unadulterated comfort. Every time I make it, I feel a little more connected to those quiet, sacred moments of creation.
Chocolate Fondant Trivia
- Chocolate fondant, also known as molten lava cake, gained popularity in French pâtisseries in the 1980s, with various claims about its origin.
- The dessert’s signature gooey center is achieved by a precise balance of baking time and temperature, making it a favorite among home chefs and pastry chefs alike.
- Some legends say the recipe was an accidental discovery—an overbaked cake with a deliciously runny center that became a classic.
Ingredient breakdown
- Dark chocolate: I choose a high-quality 70% cocoa bar; it melts beautifully and gives that intense, velvety richness. Swap for bittersweet if you prefer less bitterness, but avoid sweetened varieties that can alter the texture.
- Butter: I use unsalted butter for control over salt and flavor; it creates that glossy, tender crumb. If you’re dairy-free, coconut oil works, but it adds a subtle coconut aroma that shifts the flavor.
- Eggs: Fresh eggs are key—they help set the exterior while keeping the inside molten. If you’re out, aquafaba can be a vegan alternative, but it won’t provide quite the same richness.
- Sugar: I prefer superfine caster sugar as it dissolves quickly, ensuring a smooth batter. Using regular granulated might leave a slight grain; dissolve it thoroughly or pulse briefly in a food processor.
- Flour: Just a touch helps with structure without sacrificing that gooey center. For gluten-free, almond flour adds richness and a nutty note, though it alters the crumb slightly.
- Cocoa powder: Unsweetened, of course—sifts into the batter for that deep chocolate aroma. Dutch-processed can be used for a mellower flavor, but natural cocoa keeps it lively and bright.
- Vanilla extract: A splash elevates the chocolate’s depth. If you have vanilla bean paste, it adds specks of flavor and visual appeal, making each bite feel a little more special.
Spotlight on key ingredients
Dark chocolate:
- I choose a high-quality 70% cocoa bar; it melts beautifully and gives that intense, velvety richness. Swap for bittersweet if you prefer less bitterness, but avoid sweetened varieties that can alter the texture.
- Butter: I use unsalted butter for control over salt and flavor; it creates that glossy, tender crumb. If you’re dairy-free, coconut oil works, but it adds a subtle coconut aroma that shifts the flavor.
- Eggs: Fresh eggs are key—they help set the exterior while keeping the inside molten. If you’re out, aquafaba can be a vegan alternative, but it won’t provide quite the same richness.
Vanilla extract:
- Cocoa powder: Unsweetened, of course—sifts into the batter for that deep chocolate aroma. Dutch-processed can be used for a mellower flavor, but natural cocoa keeps it lively and bright.
- A splash elevates the chocolate’s depth. If you have vanilla bean paste, it adds specks of flavor and visual appeal, making each bite feel a little more special.
Notes for ingredient swaps
- Dairy-Free: Swap butter for coconut oil—adds a subtle coconut aroma but maintains richness.
- Vegan: Use vegan dark chocolate and aquafaba instead of eggs—still melts beautifully and keeps gooeyness.
- Sugar: Substitute with honey or maple syrup—adjust baking time slightly; adds a different flavor note.
- Gluten-Free: Replace all-purpose flour with almond flour—offers a nutty flavor and moist crumb.
- Bittersweet Chocolate: Choose a 70% cocoa bar for deep flavor—milder or sweeter chocolates will alter the intensity.
- Cocoa Powder: Dutch-processed for a mellower taste—natural cocoa keeps it lively and bright, so choose based on flavor preference.
- Vanilla: Vanilla bean paste adds visual specks—regular extract works fine, but omit if you want a cleaner chocolate focus.
Equipment & Tools
- Ramekins: To shape and bake individual portions evenly.
- Double boiler or heatproof bowl over pot: To melt chocolate gently without burning.
- Whisk: To combine eggs, sugar, and chocolate smoothly.
- Baking sheet: To hold ramekins steady while baking.
- Offset spatula or small spoon: To invert and serve the fondants carefully.
Step-by-step guide to chocolate fondant
- Preheat your oven to 200°C (390°F). Butter four ramekins generously, then dust with cocoa powder to prevent sticking.
- Melt 200g dark chocolate and 100g butter together in a heatproof bowl over a gentle double boiler. Stir until smooth and glossy. Let cool slightly.
- In a separate bowl, whisk 3 large eggs, 100g superfine sugar until combined and slightly frothy, about 1 minute. Add a splash of vanilla extract.
- Gradually pour the melted chocolate mixture into the eggs, whisking constantly to create a smooth batter. Sift in 30g cocoa powder and fold gently.
- Stir in 25g all-purpose flour just until incorporated. Do not overmix; a few streaks are fine for a tender crumb.
- Divide the batter evenly among the prepared ramekins. Place on a baking sheet for easy handling.
- Bake for 10–12 minutes. The edges should be set but the center still jiggly when gently shaken. The top will crack slightly.
- Remove from oven and let rest for 2 minutes. The tops will look slightly crusty but the centers remain molten.
- Carefully invert each ramekin onto a serving plate. Let sit for 10 seconds, then gently lift to reveal the fondant.
- Serve immediately. The chocolate should ooze out like warm velvet when cracked open, with a crisp top contrasting the gooey inside.
Let the baked fondants rest for 2 minutes in their ramekins, then invert onto plates. Serve immediately with a dusting of cocoa or a scoop of vanilla ice cream for contrast.
How to Know It’s Done
- Crust is firm but cracks easily when gently pressed.
- Center jiggles slightly when shaken but holds together without oozing excessively.
- Surface has a shiny, slightly cracked appearance, with a rich chocolate aroma.
Chocolate Fondant
Ingredients
Equipment
Method
- Preheat your oven to 200°C (390°F). Gently butter four ramekins and dust them with cocoa powder, tapping out the excess to prevent sticking.
- In a heatproof bowl set over simmering water, melt the dark chocolate and butter together, stirring until smooth and glossy. Remove from heat and let cool slightly.
- In a separate bowl, whisk the eggs and superfine sugar together until light and slightly frothy, about 1 minute, then stir in the vanilla extract.
- Pour the cooled chocolate mixture into the egg mixture, whisking constantly to combine the silky ingredients evenly.
- Sift the cocoa powder into the batter and fold gently with a spatula until fully incorporated, avoiding deflating the mixture too much.
- Add the flour and fold just until the batter is smooth, with a slightly thick, velvety texture.
- Divide the batter evenly among the prepared ramekins, filling each almost to the top for a generous molten center.
- Place the ramekins on a baking sheet and bake for 10–12 minutes. The tops should be set and slightly cracked, with the centers still jiggly when gently shaken.
- Remove the fondants from the oven and let them rest for 2 minutes. The crust will be firm but delicate, with a tempting crack revealing the molten interior.
- Gently invert each ramekin onto a serving plate using an offset spatula or small spoon, allowing the rich chocolate to flow out in a velvety pool.
- Serve immediately while warm, with a dusting of cocoa or a scoop of vanilla ice cream if desired, enjoying the contrast of crispy crust and molten center.
Pro tips for molten perfection
- Use high-quality chocolate for a rich, velvety melt that’s unmistakably indulgent.
- Slightly underbake—just 10–12 minutes—to keep the center molten and gooey when you serve.
- Watch the edges—when they’re set and slightly crusty, your fondant is nearly perfect.
- Invert the ramekins onto plates while still warm for a smooth, crack-free presentation.
- Gently shake the ramekin—if the center jiggles but holds shape, it’s ready to serve.
- For extra shine, brush the tops with a tiny bit of warm butter or cocoa powder before serving.
- Rest for 2 minutes after baking—this helps the crust set just enough to hold the molten core.
Common mistakes and how to fix them
- FORGOT to preheat oven → Always preheat to ensure even baking.
- DUMPED batter into ramekins → Fill just to the top for perfect molten centers.
- OVER-TORCHED fondant → Remove at 10–12 minutes for gooey inside.
- MISSED resting time → Rest for at least 2 minutes before serving.
Quick fixes and pantry swaps
- When batter is too thick, splash in a teaspoon of hot water to loosen.
- If fondant cracks upon inversion, slightly underbake for a softer center.
- Splash a tiny pinch of salt if the chocolate tastes flat or dull.
- Patch a cracked ramekin with a damp cloth before baking to prevent uneven cooking.
- Shield overbaked fondant with foil and give it a quick 2-minute reheat for oozy magic.
Prep, store, and reheat tips
- You can prepare the batter a day in advance; keep it covered in the fridge and bring to room temperature before baking. The flavors deepen overnight, making the chocolate richer and more complex.
- Baked fondants can be stored in an airtight container in the fridge for up to 24 hours. Reheat gently in the oven at 180°C (355°F) for about 5 minutes until warm and gooey again. The exterior will crisp slightly while the center stays luscious.
- If freezing, wrap each fondant tightly in plastic wrap and store for up to 2 months. Thaw in the fridge overnight, then reheat as above. Expect a slight change in texture, but the molten core remains satisfying.
- Overnight refrigeration may cause the fondants to firm up slightly; reheat slightly longer and cover with foil to prevent drying out. The key is to warm until just heated through and the chocolate is oozy again, with a faint crackle on the surface.
Top questions about chocolate fondant
1. How do I know when my fondant is perfectly baked?
A molten fondant should have a firm, slightly crusty top with a jiggly, gooey center that oozes when cut. The exterior will be tender and slightly crackly, with rich chocolate aroma filling the air.
2. What if my fondant is too runny or too firm?
If the edges are set and slightly crusty but the center still jiggles gently, your fondant is ready. When you shake the ramekin, the center should wobble but stay intact.
3. Can I substitute the chocolate?
Use high-quality dark chocolate, as it melts smoothly and provides that deep, velvety richness. If you prefer less bitterness, swap for bittersweet but avoid sweetened varieties that can affect texture.
4. Can I make this in advance?
Yes, you can prepare the batter a day ahead and keep it in the fridge. When ready, bring it to room temperature and bake for slightly longer, about 12 minutes, for best results.
5. How do I reheat leftover fondant?
Baked fondants can be stored in an airtight container in the fridge for up to 24 hours. Reheat in a 180°C (355°F) oven for about 5 minutes until warm and gooey again.
6. Why did my fondant crack when I inverted it?
If the fondant cracks upon inversion, it’s usually because it was overbaked. Next time, check for that slight jiggle at 10–12 minutes. Slightly underbake for a softer, more molten center.
7. What’s the best oven temperature?
Use a gentle, consistent oven temperature of 200°C (390°F). Overbaking will dry out the center, so keep an eye on that slight jiggle and remove promptly.
8. How do I prevent sticking?
Use ramekins generously buttered and dusted with cocoa powder to prevent sticking. Gently invert after resting for 2 minutes—this helps achieve a smooth, crack-free surface.
9. What if my batter is too thick or too thin?
If the batter is too thick, add a splash of hot water to loosen it. If it’s too thin, chill it briefly before baking to help set the structure.
10. Which chocolate is best for fondant?
Choose a rich, high-quality chocolate with at least 70% cocoa for that deep, intense flavor. Dutch-processed cocoa gives a mellower note, natural cocoa keeps it lively and bright.
There’s something quietly satisfying about pulling a warm, molten chocolate fondant from the oven. The way the rich, velvety center spills out, filling the air with cocoa aroma, makes every effort worthwhile. It’s a small treat that feels indulgent and intimate, perfect for sharing or savoring alone.
In the end, it’s about trusting your instincts and embracing the imperfect moments—whether it’s a slightly cracked top or a center that’s just a bit more runny than planned. That’s where the magic happens, in those real, honest bites of chocolatey warmth. And honestly, once you get the timing right, it’s a dessert that’s as rewarding to make as it is to eat.

Hi there! I’m Isabella, the founder and curious foodie behind Crumb Detective. I’ve always believed that every dish has a story to tell — from the secret family recipes passed down through generations to the bold experiments happening in kitchens around the world.