

These no-bake peanut butter bars are my go-to when stress hits hard and I need something sweet but simple. They’re like a tiny, edible hug, quick to whip up with pantry staples I always keep around. No oven, no fuss—just rich, sticky peanut butter and chocolate in every bite.
I first made these during a particularly chaotic week, when the thought of turning on the stove felt overwhelming. Somehow, crushing graham crackers and melting chocolate became my small act of comfort. They’ve stuck around ever since, because honestly, they remind me that sometimes, the easiest treats are the best therapy.
Focusing on how these bars became my unexpected comfort food during stressful times, turning simple pantry staples into a quick, satisfying escape when life feels overwhelming.
Unexpected Comfort in Every Bite
- These bars became my unexpected comfort food during stressful times, turning simple pantry staples into a quick, satisfying escape when life feels overwhelming.
- Making these is almost meditative—crushing graham crackers and melting chocolate somehow quiets my mind for a bit.
- Sharing these with friends always sparks a little joy, especially when they realize how easy and rich they are.
- There’s a nostalgic warmth in the peanut butter and chocolate combo that feels like a tiny rebellion against busy days.
The spark behind a simple treat
- This recipe came about during a weekend when I was desperately craving something sweet but had no energy to turn on the oven. I was rummaging through my pantry and grabbed what I knew—peanut butter, graham crackers, chocolate—and just started mixing. The result was so unexpectedly satisfying, I knew I had stumbled onto something worth sharing.
- Making these bars feels like a small act of rebellion against busy, complicated desserts. It’s just crushing, melting, and pressing—no fuss, no heat, just honest ingredients coming together in a way that feels almost primal. They’re my quick fix for when life’s chaos needs a sweet anchor.
- heading: ‘The spark behind a simple treat’
Contextual origin, trivia, or history
- These bars trace back to 1970s American snack culture, where quick, no-fuss treats gained popularity in busy households.
- The combination of peanut butter and chocolate was popularized during wartime rationing, making it a nostalgic comfort for many.
- Graham crackers, a key ingredient, were originally developed in the early 19th century as a healthful cracker alternative, now a classic in no-bake desserts.
- No-bake treats like these became especially popular during the 20th century, aligning with the rise of convenience cooking and less reliance on ovens.
Ingredient breakdown: key components
- Creamy peanut butter: I like a smooth, sweet variety that melts easily, giving the bars that rich, oozy feel. If yours is too stiff, warm it slightly or stir in a splash of cream.
- Graham crackers: I crush these to a fine, even crumb — it makes the texture so much better. For a nuttier crunch, swap some with crushed pretzels or digestive biscuits.
- Butter: I use unsalted, melted until just golden. If you want a richer flavor, swap half for coconut oil for a subtle tropical note.
- Chocolate: I prefer semi-sweet chips melted until glossy. For a different twist, try dark chocolate or even white chocolate for a sweeter, creamier finish.
- Honey or corn syrup: A little helps the bars stay sticky and hold together. If you prefer a less sweet version, skip it or reduce by half.
- Vanilla extract: A splash adds depth, but if you want more punch, add a pinch of sea salt or a dash of cinnamon.
- Sea salt: Just a pinch sprinkled on top enhances all the flavors. For a smoky touch, sprinkle with smoked sea salt or a pinch of cayenne.
Spotlight on key ingredients
Peanut Butter:
- Creamy peanut butter: I prefer a smooth, sweet variety that melts easily, giving the bars that rich, oozy feel. If yours is too stiff, warm it slightly or stir in a splash of cream.
- Graham crackers: I crush these to a fine, even crumb — it makes the texture so much better. For a nuttier crunch, swap some with crushed pretzels or digestive biscuits.
Chocolate:
- I prefer semi-sweet chips melted until glossy. For a different twist, try dark chocolate or even white chocolate for a sweeter, creamier finish.
- Sea salt: Just a pinch sprinkled on top enhances all the flavors. For a smoky touch, sprinkle with smoked sea salt or a pinch of cayenne.
Notes for ingredient swaps
- Dairy-Free: Swap butter for coconut oil or margarine. Expect slightly different richness and a tropical hint.
- Nut-Free: Use sunflower seed butter instead of peanut butter. It’s less gooey but still flavorful with a nutty vibe.
- Vegan: Replace honey with maple syrup or agave nectar. It maintains sweetness but adds a different depth.
- Chocolate: Opt for dairy-free dark or semi-sweet chips if you’re avoiding dairy. They melt just as glossy and rich.
- Sweetener: Substitute corn syrup with honey or maple syrup. Be aware of slight flavor and texture variations.
- Crackers: Gluten-free graham crackers or digestive biscuits work well. They might alter the crumb texture slightly.
- Add-ins: Mix in chopped nuts, dried fruit, or coconut flakes for extra texture and flavor variation.
Equipment & Tools
- Baking dish: Holds the bars and helps shape them.
- Mixing bowl: For melting and mixing ingredients.
- Spatula: To mix, spread, and press the mixture evenly.
- Microwave: Quickly melts butter and chocolate.
- Parchment paper: Prevents sticking and aids in easy removal.
- Knife: To cut the set bars into squares.
Step-by-step guide to no-bake bars
- Gather your equipment: a 20x20cm (8×8 inch) baking dish, a sturdy mixing bowl, a spatula, and a microwave-safe bowl. The dish will hold your bars, the bowl is for melting chocolate, and the spatula for mixing.
- Line the baking dish with parchment paper, leaving a slight overhang for easy removal later. This prevents sticking and makes cleanup simpler.
- In the mixing bowl, combine 1 cup (250g) peanut butter and 1/2 cup (115g) unsalted butter. Microwave at 600W for 30 seconds, then stir until smooth and shiny. If it looks separated or grainy, microwave another 10 seconds and stir again.
- Crush 2 cups (about 200g) of graham crackers into fine crumbs. You can do this by sealing them in a plastic bag and smashing with a rolling pin, or pulsing in a food processor. The finer, the better for a smooth texture.
- Add the crushed graham crackers to the peanut butter mixture. Mix thoroughly with a spatula until evenly coated and sticky. If the mixture feels too stiff, microwave for 10 more seconds and stir again.
- Pour the mixture into the prepared dish. Use your spatula to press it evenly into the corners and flatten the surface. Chill in the fridge for 15 minutes to firm up.
- While it chills, melt 1 cup (175g) semi-sweet chocolate chips in the microwave: 30 seconds, stir, then 15 seconds more if needed, until glossy and smooth.
- Pour the melted chocolate over the set peanut butter layer. Spread evenly with a spatula or back of a spoon. Tap the dish gently to settle the chocolate and remove air bubbles.
- Refrigerate the bars for at least 2 hours, or until the chocolate layer is firm and the bars are set. For best results, leave them overnight for extra firmness.
- Once hardened, lift the bars out of the dish using the parchment overhang. Cut into 16 squares with a sharp knife. For clean cuts, wipe the knife between slices.
- Serve immediately or store. For storage, keep in an airtight container in the fridge for up to a week, or freeze for longer. Let sit at room temp for a few minutes before eating if frozen.
Chill the bars until fully set, at least 2 hours. Slice with a sharp knife, serve directly from the fridge or at room temperature. Keep leftovers refrigerated, wrapped tightly, for up to a week.
How to Know It’s Done
- Chocolate layer is glossy and fully melted when poured.
- Peanut butter mixture is sticky and holds together when pressed.
- Bars are firm and chocolate is set, no jiggle or stickiness after chilling.
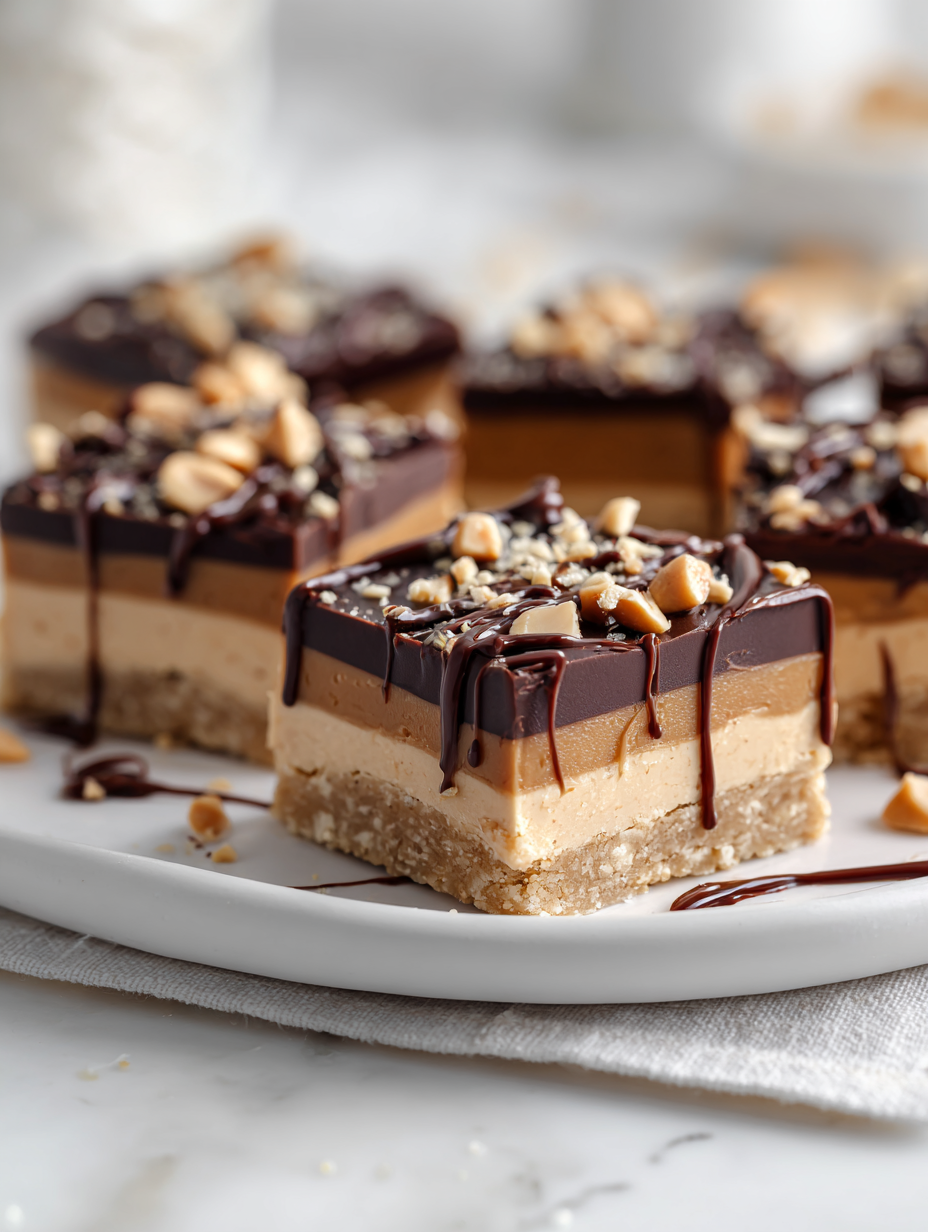
No-Bake Peanut Butter Bars
Ingredients
Equipment
Method
- Line your baking dish with parchment paper, leaving overhang on the sides for easy removal.
- In a microwave-safe bowl, combine the peanut butter and melted butter. Microwave in 30-second bursts, stirring between each, until the mixture is smooth, shiny, and well blended.
- In a separate bowl, crush the graham crackers into fine crumbs—use a food processor or seal in a bag and crush with a rolling pin for an even texture.
- Add the crushed graham crackers to the peanut butter mixture. Stir thoroughly until everything is evenly coated and sticky.
- Press the mixture firmly into the prepared dish, spreading it out with your spatula to create an even layer. Chill in the fridge for 15 minutes to set.
- Meanwhile, melt the chocolate chips in a microwave-safe bowl, heating in 15-second bursts and stirring until glossy and smooth.
- Pour the melted chocolate over the chilled peanut butter layer, spreading it evenly with your spatula. Sprinkle a tiny pinch of sea salt on top for flavor contrast.
- Refrigerate the assembled bars for at least 2 hours, or until the chocolate is fully set and the bars are firm to the touch.
- Once set, lift the bars out using the parchment overhang and place on a cutting board. Use a sharp knife to cut into 16 neat squares.
- Serve immediately or store in an airtight container in the fridge for up to a week. They can also be frozen for longer storage—just thaw slightly before enjoying.
Notes
Pro tips for perfect bars
- Cool slightly before spreading: Let the melted chocolate cool for a few minutes until it’s just warm and glossy, then pour—this prevents melting the peanut layer underneath.
- Use room temperature ingredients: Warm peanut butter and butter slightly to ensure they blend smoothly without clumping or graininess.
- Press firmly when shaping: Use the back of a spatula or your fingers to press the mixture into the pan, ensuring it’s compact and even for clean slicing.
- Chill in stages: Freeze the chocolate layer for 10 minutes before fully setting in the fridge; this helps it firm up faster and prevents cracks when slicing.
- Avoid over-melting chocolate: Melt in short bursts at low power, stirring often, to keep that shiny, smooth texture without burning or seizing.
- Line your pan: Always use parchment with overhang; it makes removing the bars clean and prevents sticking, saving you from messy cleanup.
Common mistakes and how to fix them
- FORGOT to measure ingredients precisely → Use a scale for accuracy.
- DUMPED chocolate too quickly → Add gradually and stir until smooth.
- OVER-TORCHED chocolate → Remove from heat immediately and stir to smooth.
- MISSED chilling time → Allow at least 2 hours for proper set.
Quick fixes and pantry swaps
- When chocolate seizes, splash in a tiny drop of vegetable oil and stir until smooth.
- If mixture feels too dry, add a teaspoon of milk or cream for a glossy texture.
- Dumped crushed crackers too coarse? Pulse briefly in food processor for finer crumbs.
- When bars crack while slicing, chill longer or warm the knife slightly for cleaner cuts.
- Splash a little hot water on your spatula if sticking to the chocolate for easy spreading.
Prep, store, and reheat tips
- You can prepare the peanut butter layer and crush the graham crackers a day ahead; keep them in airtight containers to maintain freshness and avoid absorbing fridge odors.
- Assemble and chill the bars in the fridge for at least 2 hours, or preferably overnight, to ensure the layers set firmly and are easy to cut.
- Store the finished bars in an airtight container in the fridge for up to a week. The chocolate will stay glossy, and the peanut butter will remain creamy.
- Reheat slightly at room temperature or in short bursts in the microwave (5-10 seconds) if you prefer softer, more melty bites. Expect a faint aroma of chocolate and peanut butter, and a gooey texture.
Top questions about no-bake peanut butter bars
1. Can I use natural peanut butter?
Yes, using natural peanut butter may make the mixture a bit less sticky, but warming it slightly can help. The bars might be a little softer, but still delicious.
2. Can I substitute other nut butters?
Absolutely. You can substitute almond or cashew butter for a different nutty flavor, though it might alter the texture slightly.
3. Can I melt chocolate differently?
Yes, you can melt the chocolate in a double boiler if you prefer not to use the microwave. Just be gentle to avoid scorching.
4. What if my bars are too soft?
If the bars aren’t firm enough, return them to the fridge for another 30 minutes. Sometimes, they need a little extra chill time.
5. Can I omit the sweetener?
You can skip the honey or corn syrup if you prefer less sweetness, but the texture might be a little drier and less sticky.
6. Can I freeze the bars?
Yes, these bars can be frozen for longer storage—up to a month. Just wrap them tightly and thaw at room temperature before slicing.
7. Should I add salt on top?
Adding a pinch of sea salt on top enhances the flavors and balances the sweetness. You can also try smoked sea salt for a different twist.
8. How do I get clean slices?
Use a sharp knife dipped in hot water to get clean cuts, especially if the chocolate layer has hardened completely.
9. Can I add extras?
Yes, adding chopped nuts, dried fruit, or coconut flakes can give extra texture and flavor. Stir them into the mixture before pressing into the pan.
10. My mixture is too dry, what do I do?
If your mixture is too dry, a tiny splash of milk or cream helps loosen it up without affecting the flavor too much.
These bars are more than just a treat; they’re a small, satisfying act of kindness you can whip up anytime. When the chocolate melts into that glossy finish, it’s a reminder that simple ingredients can create comfort in a flash.
They’re perfect for when you need a quick escape, a moment of sweetness that doesn’t demand much fuss. In busy weeks or lazy afternoons, these bars keep my pantry and my spirits in check without any extra stress.

Hi there! I’m Isabella, the founder and curious foodie behind Crumb Detective. I’ve always believed that every dish has a story to tell — from the secret family recipes passed down through generations to the bold experiments happening in kitchens around the world.