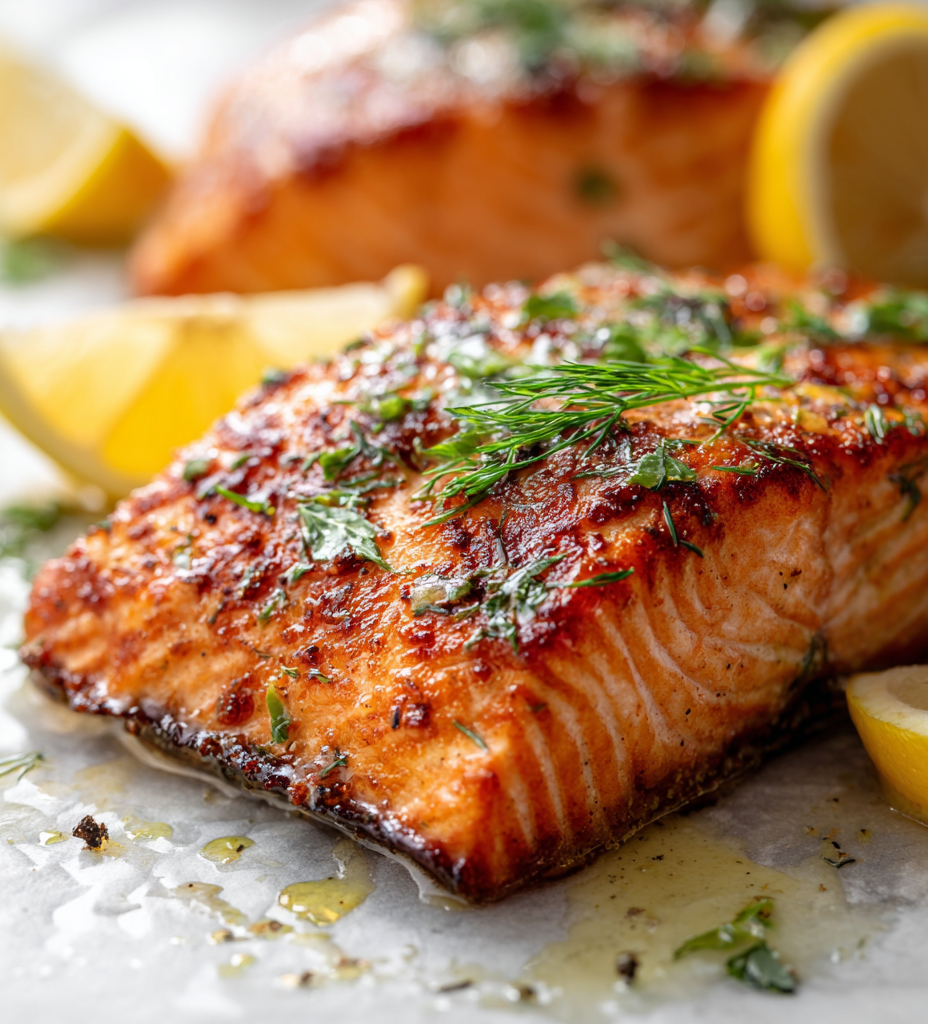

Getting that crispy skin on salmon is a small victory I chase every time I cook it. It’s not just about flavor but that satisfying crack when you cut through it, revealing tender, flaky flesh beneath. I’ve learned that a little patience and attention to skin prep go a long way—no sticking, no tearing, just golden perfection.
This method is my go-to because it’s straightforward and reliably produces that crackly, savory crust I crave. I used to struggle with uneven cooking or ending up with soggy skin, but now, with a few simple techniques, I can nail it every single time. It’s honestly become a sort of Zen moment in my kitchen—quiet, focused, and totally worth it.
Focusing on achieving the perfect crispy skin on salmon despite the common challenge of sticking or uneven cooking, this approach emphasizes the importance of skin preparation, temperature control, and pan technique to reliably get that crackly, golden crust every time.
The art of crackly, golden skin
- Cracking that perfect skin feels like a small victory every time, a satisfying crunch that makes all the prep worthwhile.
- I used to struggle with soggy skin, but now I appreciate the patience needed for that golden, crispy finish.
- That moment when the skin releases from the pan with a gentle sizzle—pure kitchen joy and relief.
- There’s a quiet pride in mastering this technique, turning a simple piece of fish into a restaurant-quality dish.
The story behind this recipe
- I stumbled upon this crispy skin technique during a chaotic week in the kitchen, when I needed a reliable way to impress without fuss. There’s something deeply satisfying about that first crack and the sizzle that signals success, even amid the mess. It’s become my go-to method not just for flavor, but for reclaiming confidence in my cooking.
- Every time I crack that skin, I remember how simple steps can turn a humble piece of salmon into a centerpiece. It’s a small act of patience that transforms the texture, making each bite a little celebration. That crispy skin isn’t just a texture—it’s a reminder that good things often come from careful, deliberate effort.
- heading: ‘The joy of a perfect crust’
Crispy Skin Salmon Trivia
- Salmon skin was traditionally discarded in many cultures, but in Japan, crispy fish skin is a sought-after delicacy, often enjoyed as a snack or garnish.
- The technique of crisping skin dates back centuries, originally as a way to preserve fish by rendering out excess moisture and creating a flavorful crust.
- In recent years, chefs around the world have popularized crispy salmon skin in fine dining, elevating it from simple home cooking to a gourmet presentation.
Ingredient breakdown for crispy skin salmon
- Salmon skin: I prefer skin with a good amount of fat for that extra crispiness and flavor—look for shiny, firm skin without tears.
- Salt: A generous sprinkle before cooking helps draw out moisture and enhances the skin’s crunch—don’t be shy.
- Oil: I use a neutral oil with a high smoke point like canola or grapeseed—helps achieve that crackly finish without burning.
- Lemon: Brightens the rich salmon—squeeze just before serving for that fresh, zesty hit.
- Pepper: Freshly cracked black pepper adds a smoky undertone—apply after cooking to prevent burning during sear.
- Optional herbs: A sprig of thyme or dill can add subtle aroma—add late in cooking or as a garnish, not during searing.
- Pan: Use a heavy, non-stick or cast-iron skillet—ensures even heat and prevents sticking, critical for that crispy skin.
Spotlight on key ingredients
Salmon skin:
- I look for shiny, firm skin with a good layer of fat—this ensures maximum crispiness and flavor. Avoid torn or slimy patches.
- Salmon flesh: I prefer bright, fresh flesh that’s firm and not overly oily—good quality makes all the difference in texture and taste.
Oil:
- Salt: I use coarse sea salt to draw out moisture and enhance crunch—sprinkle generously, then wait for the magic sizzle.
- Neutral oils like canola or grapeseed work best—they shimmer when hot and help achieve that crackly surface without burning.
Notes for ingredient swaps
- Salt: Sea salt or kosher salt work best for drawing out moisture, but if you only have table salt, use half the amount to avoid over-salting.
- Oil: Neutral oils like grapeseed or sunflower are ideal for high heat, but if you prefer a subtle nutty flavor, try toasted sesame oil—use sparingly.
- Lemon: Fresh lemon adds brightness, but bottled lemon juice can be a quick substitute—just start with less, as it’s more concentrated.
- Herbs: Fresh thyme or dill add aroma, but dried herbs can be used if fresh aren’t available—use about half the quantity and add later in cooking.
- Pepper: Freshly cracked black pepper provides a smoky punch—if you want a milder flavor, substitute with white pepper or omit altogether.
Equipment & Tools
- Heavy skillet (cast iron/non-stick): Provides even heat and helps achieve crispy skin without sticking.
- Paper towels: Dry the skin thoroughly before cooking for maximum crispness.
- Spatula: Flip the fish carefully without tearing the skin.
- Lemon (optional): Brighten the flavor just before serving.
Step-by-step guide to pan searing
- Prepare the salmon: pat dry with paper towels—aim for a moisture-free skin surface. Lightly score the skin if needed to prevent curling.
- Salt generously: sprinkle coarse salt on skin side, letting it sit for about 10 minutes. This helps draw out excess moisture for crispiness.
- Heat the pan: place a heavy skillet (cast iron or non-stick) over medium-high heat. Let it get hot—about 2-3 minutes, until shimmering.
- Add oil: pour in 1-2 tablespoons of neutral oil with a high smoke point. Swirl to coat evenly. It should shimmer but not smoke.
- Place the salmon: lay the fish skin-side down gently, starting at one corner of the pan to avoid splatter. Press down lightly for even contact.
- Sear skin-side down: cook without moving for 4-5 minutes. Look for a deep golden-brown color and a crackling sound. Adjust heat if too fast or slow.
- Flip carefully: once the skin is crisp and releases easily, flip the salmon. Cook flesh side for another 2-3 minutes, until opaque and just cooked through.
- Rest briefly: transfer to a plate, let rest for 2 minutes. This helps juices settle and keeps the skin crispy. Finish with a squeeze of lemon if desired.
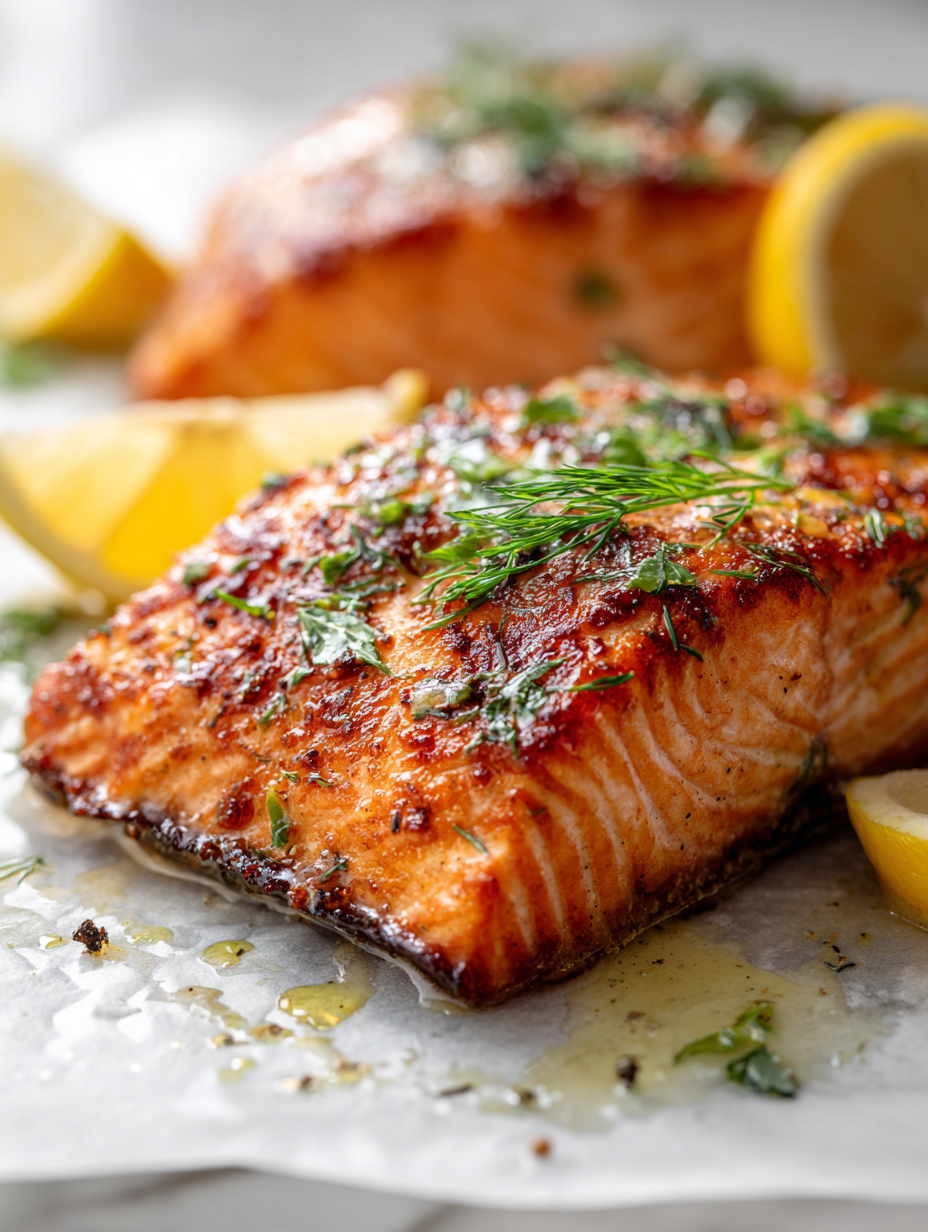
- Serve: plate immediately, skin side up, to preserve crispness. Watch for that satisfying crack when cutting through.
Let the salmon rest for 2 minutes on a warm plate to redistribe juices. Finish with a squeeze of lemon or fresh herbs if desired. Serve skin side up immediately for the crispiest bite.
How to Know It’s Done
- Color: skin should be deep golden-brown and crackly.
- Ease of release: fish lifts easily from pan without sticking.
- Internal temperature: 50-52°C (122-125°F) for medium; probe at the thickest part.
Crispy Skin Salmon
Ingredients
Equipment
Method
- Pat the salmon fillets dry thoroughly with paper towels, especially the skin, until no moisture remains. If needed, lightly score the skin to prevent curling during searing.
- Sprinkle a generous amount of coarse sea salt evenly over the skin, then let it sit for about 10 minutes. This helps draw out excess moisture for a crispier crust.
- Meanwhile, heat a heavy skillet over medium-high heat until shimmering hot, about 2-3 minutes. You should see a quick shimmer in the oil when it’s ready.
- Add 1-2 tablespoons of neutral oil to the hot pan, swirling to coat evenly. The oil should shimmer and lightly smoke without burning.
- Place the salmon fillets skin-side down gently into the pan, starting at one edge to avoid splatters. Press lightly with a spatula for a few seconds to ensure even contact and prevent curling.
- Sear the salmon skin-side down for 4-5 minutes without moving it, until the skin is deep golden-brown and crackling sounds are audible. Adjust the heat if the skin browns too quickly or burns.
- Carefully flip the fillets using a spatula and cook the flesh side for another 2-3 minutes, until the fish is opaque and just cooked through. Keep an eye on the flesh for a tender, flaky texture.
- Transfer the cooked salmon to a plate and let it rest for about 2 minutes. Squeezing fresh lemon over the top just before serving enhances the flavor and adds brightness.
- Serve immediately, skin side up, to enjoy the crispiness. As you cut into it, you'll hear that satisfying crack and see tender, flaky flesh beneath.
Pro tips for perfect crispy skin
- Bolded mini-head: Ensure skin is completely dry before seasoning to maximize crispiness—pat with paper towels thoroughly.
- Bolded mini-head: Use a hot pan—wait until it shimmers with oil before adding the fish to prevent sticking.
- Bolded mini-head: Press the salmon gently into the pan when placing skin-side down—this helps prevent curling and ensures even searing.
- Bolded mini-head: Avoid flipping the fish too early—wait until the skin releases easily and is deeply golden-brown.
- Bolded mini-head: Keep the heat at medium-high—too hot and the skin burns; too low and it won’t crisp properly.
- Bolded mini-head: Rest the cooked salmon briefly before serving—this redistributes juices and keeps the skin crispy.
- Bolded mini-head: For added crunch, finish with a quick blast under the broiler for 30 seconds—watch closely to prevent burning.
Common mistakes and how to fix them
- FORGOT to dry skin thoroughly → Pat dry skin for maximum crispiness.
- DUMPED oil in the pan → Use just enough oil to coat the surface lightly.
- OVER-TORCHED the oil → Keep heat at medium-high; adjust if oil smokes.
- TOO SOFT salmon skin → Ensure skin is dry and salted before searing.
Quick fixes and pantry swaps
- When skin sticks, splash a little hot water in the pan to loosen, then gently lift with a spatula.
- If skin isn’t crispy enough, patch with a quick high-heat blast—crackle and shimmer signal readiness.
- Dump oil that’s too smoky—wipe pan and start with fresh, high-smoke point oil for clean sear.
- When salmon tears, rescue with a gentle spatula, then reduce heat and cook slower for even crispness.
- Splash a touch of lemon juice after searing—brightens flavor and enhances that crispy contrast.
Prep, store, and reheat tips
- Prep the salmon skin: thoroughly pat dry and salt ahead of time, then refrigerate uncovered for up to 1 hour to help draw out moisture and enhance crispiness.
- Store cooked salmon in an airtight container in the fridge for 1-2 days. Reheat gently in a hot skillet, skin side up, until warmed and crispy again—watch for crackle and golden tone.
- If freezing, wrap tightly and store for up to 2 months. Reheat from frozen in a hot skillet, adding a splash of oil and cooking until the skin crisps again, about 3-4 minutes.
- Reheating will soften the skin slightly; for best texture, re-crisp in a hot pan over medium-high heat, listening for that satisfying crackle and checking that the flesh is heated through.
FAQs about Crispy Skin Salmon
1. Why is my salmon skin not crispy enough?
Use a paper towel to thoroughly dry the skin; moisture is the enemy of crispiness. Pat it dry until no shine remains.
2. How do I know when the pan is hot enough?
Ensure your pan is hot enough before adding the fish; shimmer in the oil indicates proper heat to prevent sticking.
3. When should I flip the salmon?
Salmon skin tends to stick if it’s not dry or if you try to flip too early. Wait for a deep golden color and easy release.
4. How long should I cook the salmon?
Cooking times depend on thickness, but generally 4-5 minutes skin-side, then 2-3 minutes flesh-side at medium-high heat.
5. What kind of salmon skin works best?
Salmon skin with a good layer of fat crisps better and stays crispy longer. Look for shiny, firm skin without tears or slime.
6. What oil is best for searing salmon?
Use neutral oils like grapeseed or canola for high smoke point and flavor neutrality. Avoid olive oil for high heat as it smokes easily.
7. Should I salt the salmon skin beforehand?
Salt helps draw out moisture, making the skin crunchier. Salt generously before cooking and let it sit for about 10 minutes.
8. How do I keep the skin crispy after cooking?
Rest the cooked salmon for a couple of minutes to allow juices to settle. Serve skin side up immediately to keep it crispy.
9. What if the skin sticks to the pan?
If the skin sticks, splash hot water into the pan to loosen, then gently lift with a spatula. Patience helps avoid tearing.
10. How do I reheat crispy salmon without losing texture?
Reheat in a hot skillet, skin side up, for 2-3 minutes until crackling and warm. For freezer leftovers, re-crisp in a hot pan.
Mastering crispy skin on salmon feels like a small, satisfying victory each time. It’s a simple pleasure—crunchy, golden, and just barely smoky—that makes a humble piece of fish feel special.
This dish is a reminder that patience and attention to detail in the kitchen can elevate everyday ingredients. It’s a technique I keep coming back to, especially when I want that perfect crackle and tender flesh in one bite.

Hi there! I’m Isabella, the founder and curious foodie behind Crumb Detective. I’ve always believed that every dish has a story to tell — from the secret family recipes passed down through generations to the bold experiments happening in kitchens around the world.