

These monster rice krispie treats started as a way to tame the chaos of leftover cereal and marshmallows. I wanted something that felt a little rebellious, a little over-the-top—like the treats you’d sneak into a movie theater or find at a carnival. They’re chewy, crunchy, and just a little bit wild, perfect for when you need a sweet, no-fuss snack.
Why I Keep Coming Back to This Recipe
It’s honest, chaotic, and forgiving. Every batch feels like a little victory, especially when I add my own twist—like spicy cinnamon or peanut butter. These treats are quick to make, and the mess always makes me smile. They remind me that sometimes, the best things are simple, messy, and made with a little love.
Ingredient Breakdown & Variations
- Mini marshmallows: They melt quickly and create that gooey, stretchy texture. Swap for regular marshmallows if you like a thicker, chewier treat.
- Crispy rice cereal: The backbone of crunchiness. Brown rice cereal gives a nuttier flavor, but classic puffed rice works fine.
- Butter: Adds richness and helps the marshmallows melt smoothly. Use vegan butter for dairy-free options.
- Vanilla extract: A splash adds depth, but skip if you’re going for a more straightforward marshmallow flavor.
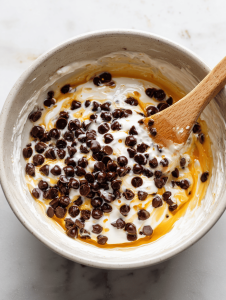
- Add-ins (chocolate chips, sprinkles): Optional but fun—stir into the mixture or sprinkle on top before setting.
- Salt: A tiny pinch enhances sweetness and balances flavors.
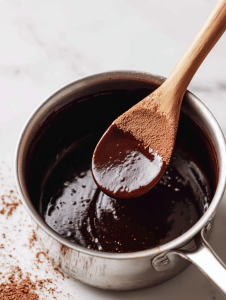
- Food coloring or flavored extracts: For a visual or flavor twist—just a few drops can make it pop.
Tools & Equipment for Monster Rice Krispie Treats
- Large saucepan: To melt butter and marshmallows evenly.
- Spatula or wooden spoon: For folding cereal into melted marshmallows.
- 9×13-inch pan: To shape and set the treats.
- Butter or non-stick spray: To grease the pan for easy removal.
- Wax paper or buttered spatula: To press the mixture into the pan smoothly.
The Chewy, Crunchy Process
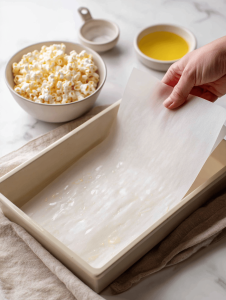
Step 1: Grease a 9×13-inch pan with butter or non-stick spray, then set aside.
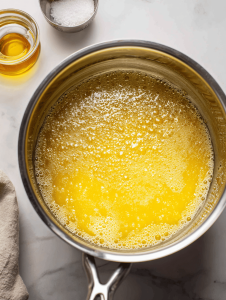
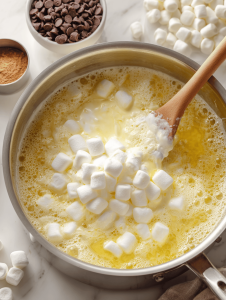
Step 2: In a large pot, melt 4 tablespoons of butter over medium heat, until bubbly and fragrant—about 2 minutes.
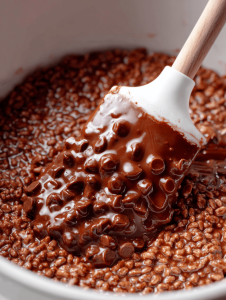
Step 3: Add 10 oz of mini marshmallows. Stir constantly until fully melted and smooth, about 3-4 minutes.
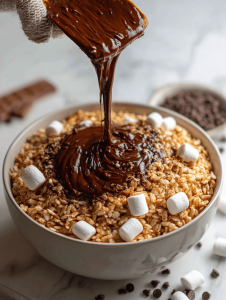
Step 4: Remove from heat. Quickly stir in 6 cups of crispy rice cereal, folding until evenly coated.
Step 5: Press the mixture into the prepared pan with buttered spatula or wax paper. Flatten and press firmly, about 2 minutes.
Step 6: Let sit at room temperature for at least 30 minutes until set and firm.
Step 7: Cut into squares or fun shapes. Serve once cooled, or store in an airtight container.
Cooking Checkpoints & Tips for Monster Rice Krispie Treats
- Ensure marshmallows are fully melted before adding cereal to prevent clumping.
- Press mixture firmly into pan for even thickness and better chew.
- Watch for a golden, glossy surface when melting marshmallows—don’t let them brown too much.
- If the mixture seems too dry, add a splash of melted butter or a few more marshmallows.
Common Mistakes & How to Fix Them
- Marshmallows burnt or too brown.? Use medium heat to avoid burning marshmallows.
- Treats fall apart when cut.? Press mixture firmly into the pan to prevent crumbling.
- Uneven melting or sticking.? Stir continuously to prevent marshmallows from sticking to the bottom.
- Treats feeling crumbly or dry.? Add a pinch more butter if mixture is too dry.

Monster Rice Krispie Treats
Ingredients
Equipment
Method
- Grease a 9x13-inch pan with butter or non-stick spray, then set aside.
- In a large saucepan, melt the butter over medium heat until it bubbles and releases a rich, buttery aroma—about 2 minutes.
- Add the mini marshmallows to the melted butter. Stir constantly with a spatula or wooden spoon until they melt completely and the mixture becomes smooth and glossy, about 3-4 minutes.
- Remove the saucepan from heat. Quickly pour in the crispy rice cereal and fold gently with the spatula until the cereal is evenly coated in the marshmallow mixture.
- Transfer the sticky mixture into the prepared pan. Press it down firmly with buttered wax paper or a spatula to create an even layer. Flatten the top and smooth the surface.
- Allow the treats to sit at room temperature for at least 30 minutes, until fully set and firm.
- Once cooled, cut into squares or fun shapes with a sharp knife or cookie cutters. Serve immediately or store in an airtight container for later.

Hi there! I’m Isabella, the founder and curious foodie behind Crumb Detective. I’ve always believed that every dish has a story to tell — from the secret family recipes passed down through generations to the bold experiments happening in kitchens around the world.