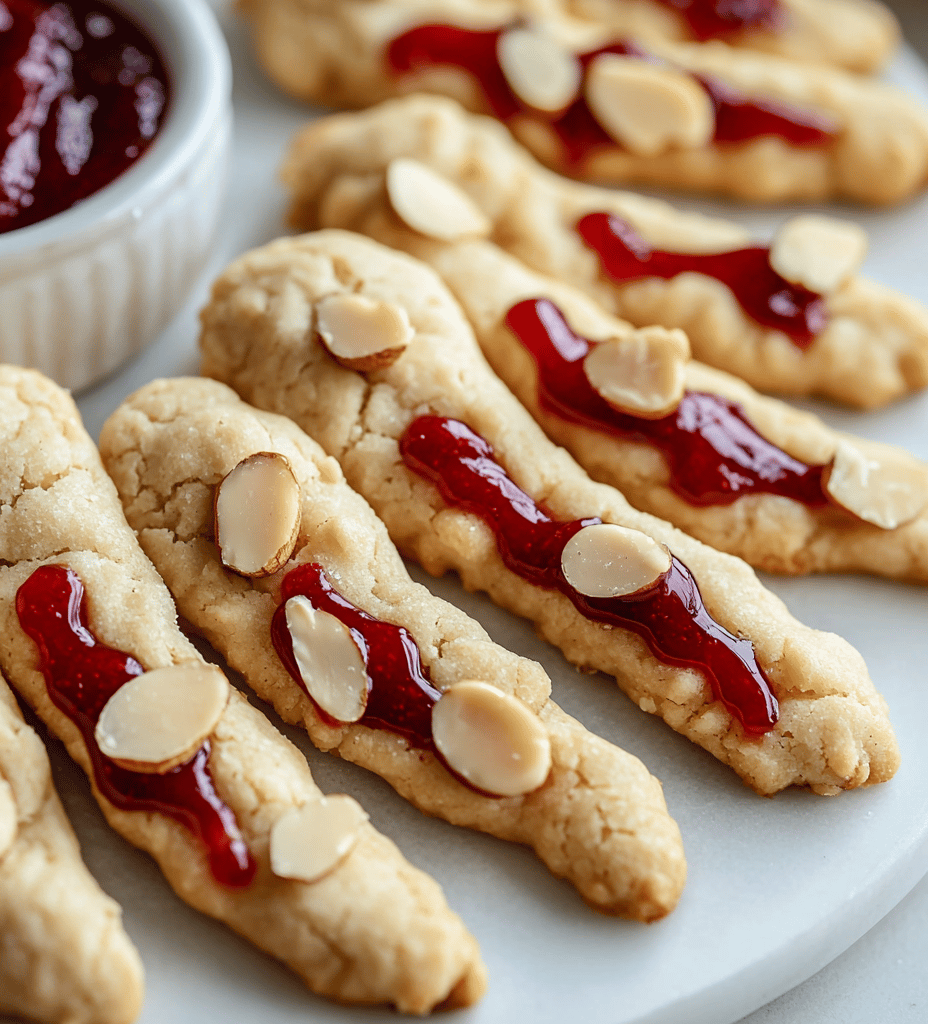

Halloween is the perfect time to embrace the spooky and bizarre, especially when it comes to treats that pique curiosity and ignite giggles. These Witch Finger Cookies stand out because of their eerily realistic appearance—like tiny severed fingers peeking from a bowl. As I shape every delicate limb, the aroma of vanilla and almond butter fills my kitchen, blending into a delightful eeriness.
What makes this recipe truly special is how it transforms simple ingredients into a mini horror show that’s surprisingly delicious. Kids and adults alike squeal with delight when they see their first finger, then happily munch through the nutty, buttery cookie. It’s chaos, creativity, and nostalgia rolled into one creepy, tasty package.
WHY I LOVE THIS RECIPE?
- The challenge of turning an ordinary cookie into a spooky art piece is pure joy.
- Memories flood back of childhood Halloween pranks and candy hunts.
- The aroma of baked almonds and vanilla sparks such festive cheer.
- Seeing the surprised looks on guests’ faces makes all the effort worthwhile.
- It’s a perfect blend of creepy, cute, and ridiculously fun to make.
AVOID MY DISASTER (You’re Welcome)
- FORGOT to chill the dough? Fingers spread too flat, fix by refrigerating before shaping again.
- DUMPED too much red food coloring? Resulting in a slimy look, use less color next time.
- OVER‑TORCHED the tips? Burned nail beds, keep a close eye on the oven.
- TOO LITTLE almond paste? Fingers look limp, add a quarter teaspoon more for firmness.
QUICK FIXES THAT SAVE YOUR DAY
- When dough is sticky, splash in a bit more flour to firm it up.
- Patch cracked fingers with a tiny dab of royal icing for seamless joints.
- Shield your cookies from over-browning by a quick aluminum foil tent.
- When in doubt, add a dash of vanilla fragrance; it masks minor flaws.
- When the cookies spread too much, quickly refrigerate for 15 minutes before baking.
These Witch Finger Cookies are more than just festive treats—they’re a small theatrical performance baked into your oven. They capture the spirit of Halloween with a tactile, creepy surprise that adds a spark of joy and a touch of chaos. Whether it’s a family gathering or a solo baking escapade, they’re sure to turn any spooky night into a memorable experience.
So gather your ingredients, embrace the chaos, and have fun transforming simple dough into your own batch of ghoulish delights. After all, the best Halloween memories often come from a little bit of mischief—and a lot of tasty fun.
Witch Finger Cookies
Ingredients
Equipment
Method
- Cream together the softened butter and granulated sugar in a mixing bowl until the mixture is light and fluffy, with a slightly creamy texture and a sweet aroma.
- Beat in the egg, vanilla extract, and a small splash of almond extract until well combined, the mixture will appear smooth and slightly glossy.
- In a separate bowl, whisk together the flour, baking powder, and salt to evenly distribute the dry ingredients.
- Gradually add the dry mixture to the wet ingredients, folding it in gently with a spatula until the dough just comes together and is firm but pliable.
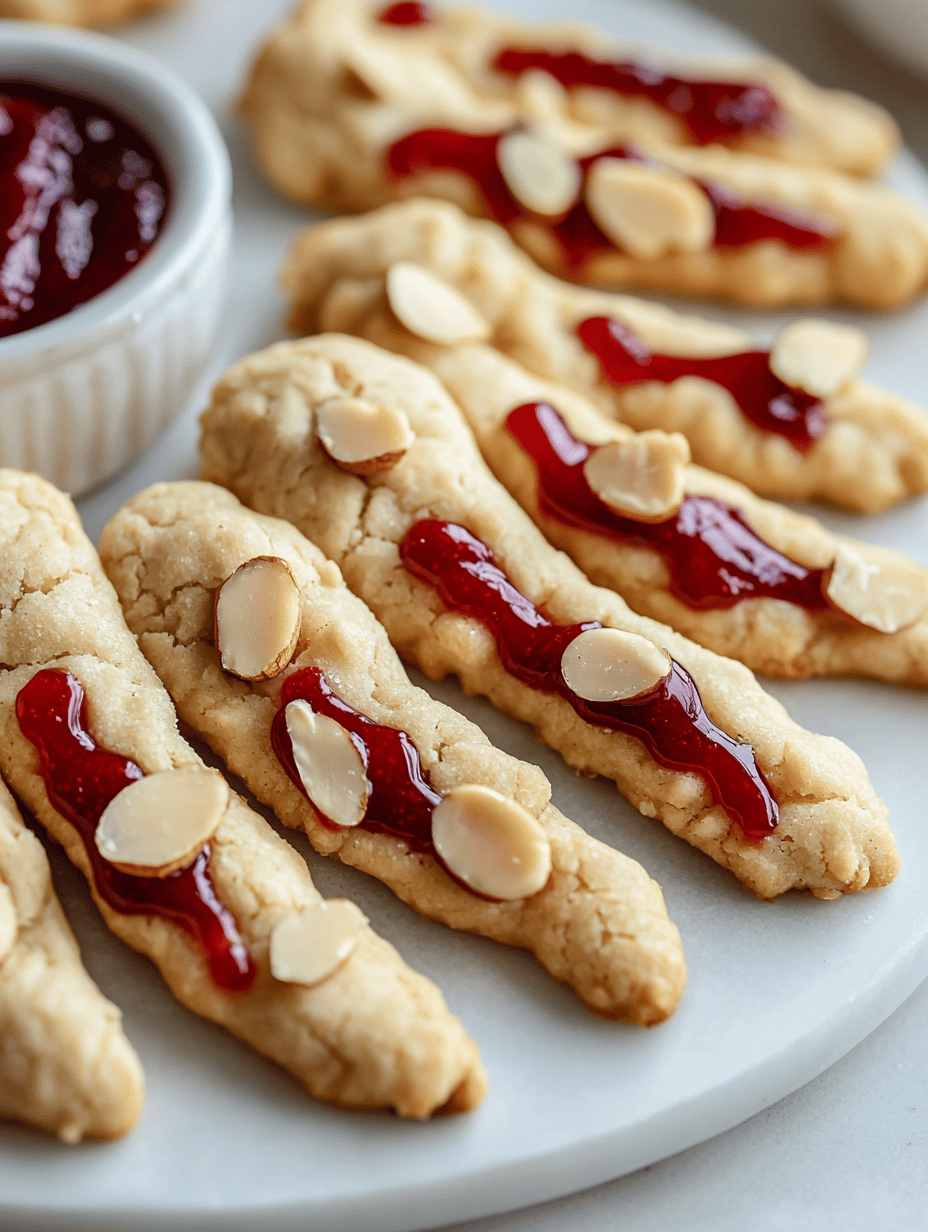
- Divide the dough into 12 portions and roll each into a thin, elongated finger shape. Slightly taper the ends for a realistic nail bed look.
- Flatten and texture the dough slightly to resemble knuckles or wrinkles using your fingers or a small tool.
- Place the shaped fingers on a baking sheet lined with parchment paper, spacing them apart to allow for slight spreading.
- Insert a small piece of softened almond paste at the fingertip for the nail, then brush the tips with a little red food coloring mixed with a tiny bit of water to mimic blood or bloodstains.
- Bake the cookies in a preheated oven at 350°F (175°C) for about 12-15 minutes until they turn golden brown and crispy on the edges, smelling sweet and nutty.
- Remove from oven and allow the cookies to cool on the baking sheet for a few minutes, then transfer to a wire rack to cool completely, which helps set their shape.
- Decorate the knuckles with tiny black sesame seeds or black sugar for added detail and grotesque realism. Serve once fully cooled and enjoy the spooky fun!
Notes
As the baking oven cools down, the lingering scent of vanilla and toasted almonds fills the air. These cookies aren’t just a visual gag—they pack a satisfying crunch followed by a nutty, buttery flavor with every bite. The fun is in the details, from the realistic nails to the slight wobble of the fingers, each cookie brings a little bit of Halloween magic.
They’re perfect for turning an ordinary baking session into a creative spotlight during this festive season. Watching loved ones react with surprise and laughter makes every step worthwhile. These Witch Finger Cookies will surely be a highlight of your spooky menu, echoing the playful chaos of Halloween nights past and present.

Hi there! I’m Isabella, the founder and curious foodie behind Crumb Detective. I’ve always believed that every dish has a story to tell — from the secret family recipes passed down through generations to the bold experiments happening in kitchens around the world.